 40% off
- Physics
- Ready-made model
- Class 10 to 12
Wheatstone Bridge Using Multimeter Science Class 12 Physics Investigatory Project Model
Code B0HLY1WYS5
- Paid for and delivered by Amazon. The current price and the delivery date for your PIN code are shown there.
- Sold by Gurukul Technicals Institute, Delhi.
- Need a different topic, a custom version or a school order? Ask on WhatsApp.
In this project guide
Ready-made model
About this model
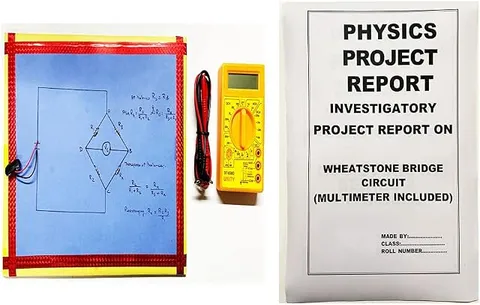
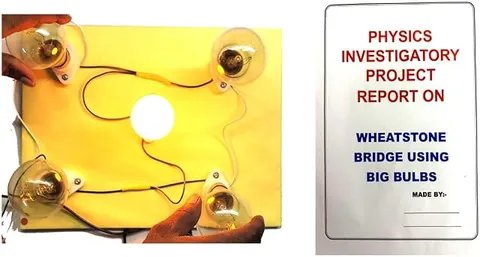
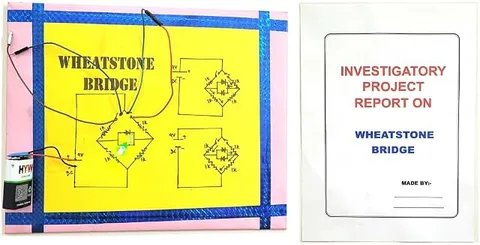
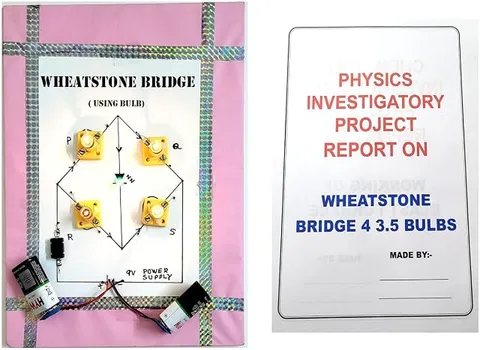
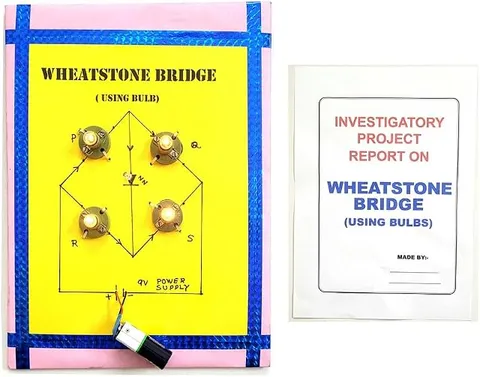
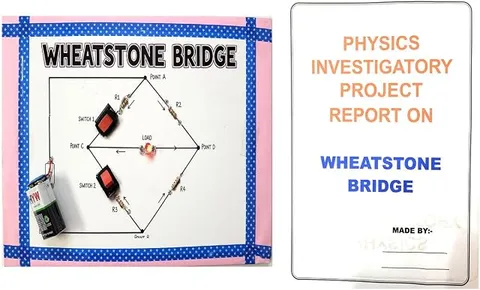
This physics investigatory project finds an unknown resistance with a Wheatstone bridge balanced using a multimeter, as its name says. Its only listing photo is the same as that of the plain Wheatstone bridge board, with switches, an LED detector and no multimeter, so this model's own layout is not shown: ask for a photo of it before you order.
How it works
The science behind it
The idea the model demonstrates, in words you can use in your report and when you explain it.
A Wheatstone bridge is four resistances, P, Q, R and S, joined in a loop. A battery is connected across one pair of opposite corners and a detector, usually a galvanometer, across the other pair. P and Q form one path, and R and S the other. When P/Q = R/S, both ends of the detector are at the same potential, so no current flows through it and the bridge is balanced. If three resistances are known, the fourth can be found from this condition, which follows from Kirchhoff's laws. This is a null method: it needs only a zero reading, so the result does not depend on the meter's calibration. The bridge is most sensitive when all four resistances are of similar size. With the arms named R1 to R4 as in the build guide, the condition is R1/R3 = R2/R4. A multimeter across the detector points gives a true null reading, which an LED cannot, because an LED conducts only one way and needs roughly 2 V before it glows.
Make it yourself
Make a Wheatstone bridge with a multimeter yourself
Build your own version from scratch, or use the steps to understand how the ready-made model is put together before you present it.
What you need 8
Step by step 10 steps
Mark four points A, B, C and D as a diamond, with A at the top, B at the bottom, C on the left and D on the right.
Connect a 1 kΩ resistor from A to C as R1 and another from C to B as R3; these are the ratio arms.
Connect the potentiometer, using its middle pin and one end pin, from A to D as R2, and an unknown resistor from D to B as R4.
Connect the battery through the switch across A and B.
Set the multimeter to DC volts and touch its probes to C and D.
Set the potentiometer knob to the middle, switch on and turn it slowly until the multimeter reads as close to zero as you can get. The bridge is now balanced.
Switch off, take the potentiometer out without turning its knob, and measure its resistance between the same two pins with the multimeter's resistance range. Since R1 = R3, the unknown resistance equals this reading.
Check by measuring the unknown resistor directly, and work out the percentage difference.
Repeat with the other unknown resistors and record the results in a table.
For a visual indicator, join the two LEDs side by side facing opposite ways, and connect the pair in series with a 1 kΩ resistor across C and D: one glows when C is higher, the other when D is higher, and both go dark near balance.
Read this first
Safety first
Go through these points before you build or switch anything on. Younger students should do this with an adult.
- Switch off the battery before changing any part or measuring resistance; never use the resistance range on a live circuit.
- Do not let a loose wire join the battery terminals, and remove the battery when you finish.
- Keep a resistor in series with the LEDs; never connect an LED straight across the battery.
- If any resistor or the potentiometer gets hot, switch off at once and recheck the wiring.
- Choose the right multimeter range before touching the probes to the circuit, so the meter is not damaged.
Troubleshooting
If something does not work
The usual problems with this model and how to fix them. Open a problem to see the fix.
The multimeter never reaches zero
The potentiometer's range may not cover the unknown value. Use a smaller unknown or a larger potentiometer, and check that R1 and R3 are equal.
The reading jumps about
A connection is loose. Press the resistor legs firmly into the breadboard or tighten the terminals, and check the battery snap.
The reading is negative
D is at a higher potential than C, or the probes are swapped. This does no harm; balance is still where the reading is zero.
The LED indicator stays dark
Near balance the voltage between C and D is below the LED's forward voltage, so this is expected. Check with the multimeter, which shows the true reading, and fit a fresh battery if the reading is low everywhere.
Exhibition day
How to present it
A running order for the exhibition table or the practical, step by step.
Draw the bridge on a chart, mark the two arms of one path as P and Q and the two arms of the other path as R and S, and write the balance condition.
Connect the multimeter on its DC volts range across the detector points and show the reading falling to zero as you balance the bridge.
Change one arm and show the reading moving away from zero, to explain why balance needs P/Q = R/S.
Explain why a multimeter makes a better detector than an LED: an LED needs about 2 V and conducts in one direction only.
Practice
Viva questions
Practice questions on this model, with short answers. Try each one aloud before you open the answer.
State the balance condition of a Wheatstone bridge.
The bridge is balanced, with no current through the galvanometer, when P/Q = R/S.
Why is the Wheatstone bridge called a null method?
Because the result is read where the detector shows zero current, so the meter's calibration does not affect it.
Does the balance change if the battery and galvanometer are interchanged?
No, the balance condition P/Q = R/S stays the same when they are interchanged.
Name a practical form of the Wheatstone bridge.
The meter bridge, or slide wire bridge, used to find an unknown resistance in the Class 12 practical.
Project file
Project file outline
The headings of the project file, in order. Give each heading its own section and write it in your own words.
Free ebook: Writing a Science Project FileContents
- Aim: to find an unknown resistance using a Wheatstone bridge
- Introduction: resistance, Ohm's law and Kirchhoff's laws
- Principle of the Wheatstone bridge and derivation of the balance condition
- Circuit diagram and construction
- Procedure for balancing the bridge with a multimeter
- Observations table: known resistances, balance reading and calculated unknown
- Calculation of percentage error
- Precautions and sources of error
- Applications: the meter bridge, strain gauges and temperature sensors
- Conclusion and bibliography
Buying checklist
Before you buy
What to check before you order the model, and what to do when it arrives.
1Before you order
- Check with your teacher that a Wheatstone bridge project suits your Class 12 investigatory topic.
- The name says the project uses a multimeter, but the listing photo shows none, so ask on WhatsApp or check the listing whether a multimeter comes with it before you order.
- Practise deriving the balance condition on paper, since examiners often ask for it in the viva.
- Keep the box and carry the board flat so the parts and wires are not bent.
- Check the delivery date for your PIN code on the marketplace, and order well before the exhibition or practical.
2When it arrives
- Test the model soon after it arrives, and keep a spare battery for the exhibition.
Next steps
Take it further
Ways to turn this model into a bigger investigation or a stronger exhibition entry.
Replace R4 with an LDR or a thermistor and show how the balance shifts with light or temperature.
Build a meter bridge with a uniform wire and a metre scale, and compare its result with the multimeter reading.
Test how sensitive the bridge is by noting the multimeter reading for small turns of the potentiometer near balance.
Audience
Who it suits
Suits Class 12 physics investigatory projects and practical revision on current electricity, Kirchhoff's laws and the meter bridge.
- ClassClass 10 to 12
- SubjectPhysics
- TypeReady-made model
Free to read
Free ebooks for this topic
Free PDF ebooks from Gurukul Technicals Institute on the science, the making and the presenting of projects like this one.
- Free PDF ebook
Physics Working Models Explained
Twenty classic models, how each works and how to make it
- Free PDF ebook
Investigatory Projects for Class 11 and 12
Topics, method and report structure for physics, chemistry and biology
- Free PDF ebook
Your Science Exhibition Guide
Choose a project, build it, present it and answer the judges with confidence
- Free PDF ebook
Writing a Science Project File
How to write the report, from the cover page to the bibliography