- Physics
- Ready-made model
- Class 10 to 12
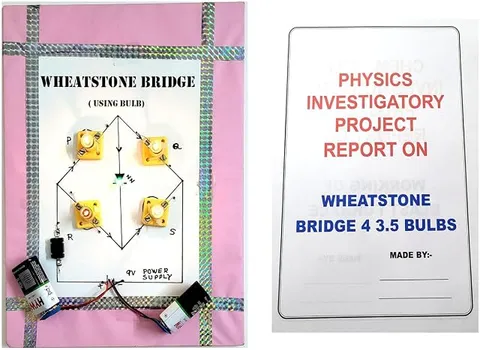
Wheatstone Bridge Using Bulb Physics Investigatory Project
Code B0G2T8S54L
- Paid for and delivered by Amazon. The current price and the delivery date for your PIN code are shown there.
- Sold by Gurukul Technicals Institute, Delhi.
- Need a different topic, a custom version or a school order? Ask on WhatsApp.
In this project guide
Ready-made model
About this model
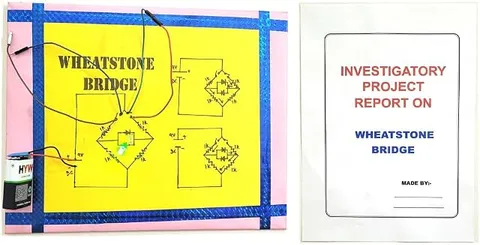
This project builds a Wheatstone bridge with bulbs instead of plain resistors, so the balance of the bridge can be seen with your own eyes rather than read on a meter. It ties together Ohm's law and the bridge principle in one visual model.
What the listing says
- Ohm’s Law Model
How it works
The science behind it
The idea the model demonstrates, in words you can use in your report and when you explain it.
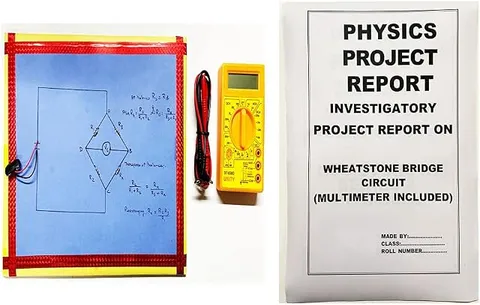
By Ohm's law, V = IR. In a Wheatstone bridge, four arms form a diamond, with the supply across one diagonal and a detector across the other. In a typical bulb bridge, bulbs form the arms and a lamp across the middle acts as the detector. When the ratio of the two arms in one branch equals the ratio in the other (P/Q = R/S), both ends of the middle lamp are at the same potential, so no current flows and it stays dark. Change one arm and the potentials become unequal, current flows through the middle and the lamp glows. Bulbs add a twist: a filament's resistance rises as it heats up, so a bulb does not strictly obey Ohm's law, which is why identical bulbs are used in the arms. It is like a tarazu at a sabzi mandi: when both sides match, the pointer stays at the centre.
Make it yourself
Make a Wheatstone bridge with bulbs yourself
Build your own version from scratch, or use the steps to understand how the ready-made model is put together before you present it.
What you need 8
Step by step 8 steps
Mark corners A, B, C and D in a diamond and fix a bulb holder on each side: P from A to B, Q from B to C, R from A to D and S from D to C.
Connect the battery pack and switch across A and C.
Fix the 2.5 V detector bulb across B and D.
Fit the four identical 3 V bulbs and switch on. The arm bulbs glow and the middle bulb stays dark, because B and D are at the same potential.
Replace S with a 6 V bulb. The middle bulb should now glow, though only faintly, so darken the room to see it; S has a different resistance and D's potential no longer matches B's.
Now replace R with the other 6 V bulb. The middle bulb goes dark again: P/Q = R/S once more, even though the bulbs are not all the same.
At balance, measure the voltage from A to B and from A to D with the multimeter; they should be equal.
Label the diamond, write P/Q = R/S beside it, and note that the balance does not depend on the battery's exact voltage.
Read this first
Safety first
Go through these points before you build or switch anything on. Younger students should do this with an adult.
- Use AA cells only, and do not touch bulbs while they are lit, as they get warm.
- Switch off before changing any bulb.
- Never connect a 3 V bulb straight across the 6 V battery, or it will burn out.
- Screwing holders and cutting the base need adult supervision.
Troubleshooting
If something does not work
The usual problems with this model and how to fix them. Open a problem to see the fix.
The middle bulb glows even with four identical bulbs
The bulbs may not be truly identical, or one is loose in its holder. Tighten every holder and swap bulbs around until you find a matching set.
The middle bulb never glows
The bulbs you swapped may be too similar, or the difference is too small to light it. Use a bulb with a very different rating, darken the room, or put the multimeter across B and D to see the small voltage.
The arm bulbs are dim
Check the cells first. Each pair of arm bulbs shares the battery voltage, so a weak battery shows up quickly.
The balance seems to shift after switching on
A filament's resistance rises as it heats up. Wait a few seconds for the bulbs to warm before judging the balance.
Exhibition day
How to present it
A running order for the exhibition table or the practical, step by step.
Show the balanced state with the middle lamp dark; if your model lets you change one arm, unbalance it and show the lamp light up.
Explain on a chart why equal potentials mean zero current through the middle.
Say honestly that bulbs are non-ohmic, and explain how this affects your results.
Compare your bulb bridge with the metre bridge used in the school lab.
Practice
Viva questions
Practice questions on this model, with short answers. Try each one aloud before you open the answer.
Why does the middle lamp not glow when the bridge is balanced?
Both its ends are at the same potential, so there is no potential difference across it and no current through it.
Does a filament bulb obey Ohm's law?
Not strictly, because the filament's resistance increases as it gets hotter, so its V-I graph is not a straight line.
What happens to the middle lamp if one arm's resistance is increased?
The bridge becomes unbalanced, a potential difference appears across the middle lamp, and current flows through it so it glows.
What is the SI unit of resistance?
The ohm (Ω), which is one volt per ampere.
Project file
Project file outline
The headings of the project file, in order. Give each heading its own section and write it in your own words.
Free ebook: Writing a Science Project FileContents
- Aim: to show the balance of a Wheatstone bridge using bulbs and verify P/Q = R/S
- Introduction: Ohm's law and potential difference
- Materials and circuit diagram of the bulb bridge
- Theory: the balance condition and why no current flows through the detector
- Why a bulb is non-ohmic: filament resistance rises as it heats
- Procedure: balancing, unbalancing and rebalancing the bridge
- Observations: detector bulb state for each change, and voltages measured at balance (table)
- Applications of the bridge principle
- Conclusion: what the bulbs showed about P/Q = R/S, and precautions
Buying checklist
Before you buy
What to check before you order the model, and what to do when it arrives.
1Before you order
- Check that it fits your electricity syllabus and whether your teacher wants readings or a demonstration.
- Read the listing for the power source and whether bulbs and batteries are included.
- Test the balance a few days before the exhibition, in lighting similar to the hall's.
- Keep the box, because bulbs and their holders break easily.
- Check the delivery date for your PIN code on the marketplace, and order well before the exhibition or practical.
- Practise explaining it. Judges ask what the model shows and why; knowing the science matters as much as the model. The viva questions above are a good place to start.
2When it arrives
- On arrival, check that every bulb lights, and keep two spare bulbs of the same rating.
Next steps
Take it further
Ways to turn this model into a bigger investigation or a stronger exhibition entry.
Replace one arm bulb with a fixed resistor and show how the balance changes as the bulbs warm up.
Measure each bulb's resistance cold with the multimeter and when lit from V and I, to show the filament effect.
Compare the bulb bridge with a resistor bridge and with the metre bridge in your school lab.
Audience
Who it suits
Suits Class 10 to 12 physics exhibitions and investigatory projects on Ohm's law and current electricity.
- ClassClass 10 to 12
- SubjectPhysics
- TypeReady-made model
Free to read
Free ebooks for this topic
Free PDF ebooks from Gurukul Technicals Institute on the science, the making and the presenting of projects like this one.
- Free PDF ebook
Electricity and Magnetism Experiments
Hands-on experiments with cells, wires, bulbs and magnets
- Free PDF ebook
Physics Working Models Explained
Twenty classic models, how each works and how to make it
- Free PDF ebook
Investigatory Projects for Class 11 and 12
Topics, method and report structure for physics, chemistry and biology
- Free PDF ebook
Your Science Exhibition Guide
Choose a project, build it, present it and answer the judges with confidence