- Physics
- DIY kit
- Class 10 to 12
- Printed report included
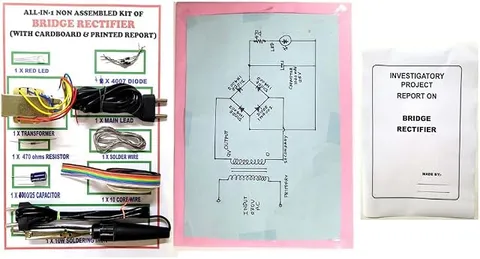
Half Wave Bridge Rectifier Kit DIY for 12th Class with Board and Report Physics Educational Investigatory Project for School & Colleges
Code B0DK22BH2B
- Paid for and delivered by Amazon. The current price and the delivery date for your PIN code are shown there.
- Sold by Gurukul Technicals Institute, Delhi.
- Need a different topic, a custom version or a school order? Ask on WhatsApp.
In this project guide
DIY kit
About this kit
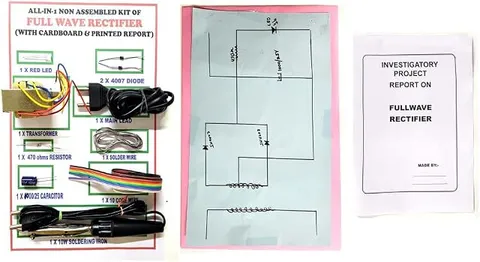
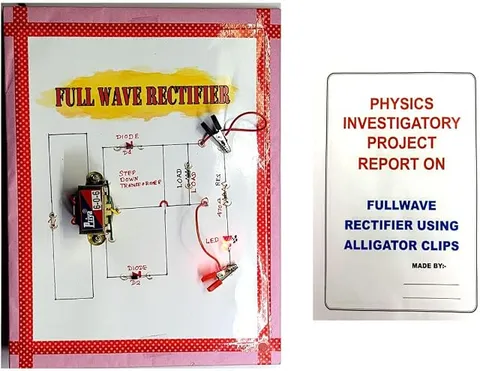
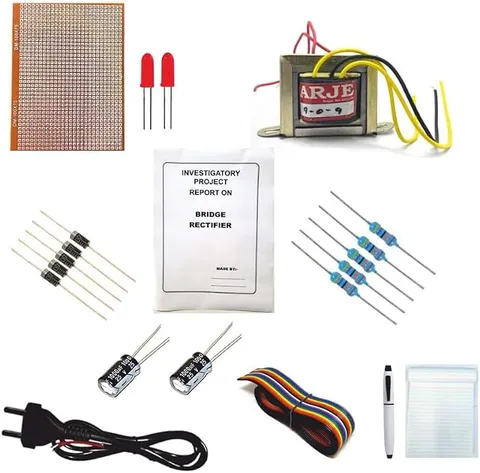
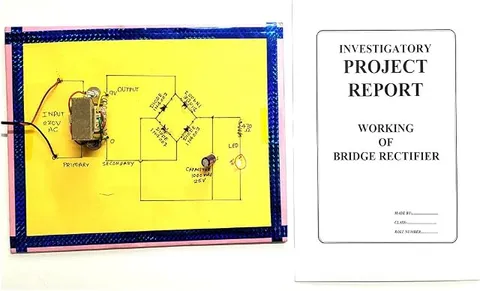
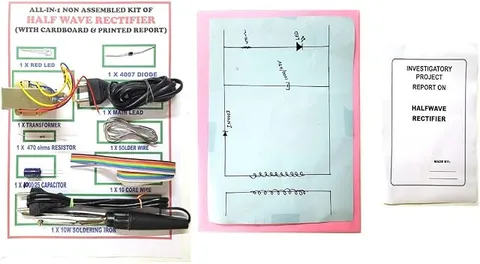
This DIY kit is sold as a half wave bridge rectifier project for Class 12 physics, and the listing says it includes a board and a report. Because a bridge of four diodes is normally used for full wave rectification, check the listing or the board to see which output your circuit gives; the comparison itself makes a strong viva topic. Either way, the kit teaches how diodes turn AC into DC.
How it works
The science behind it
The idea the kit demonstrates, in words you can use in your report and when you explain it.
A half wave rectifier needs just one diode, which conducts only on one half of every AC cycle. A bridge rectifier uses four diodes arranged in a diamond: on one half cycle two opposite diodes conduct, and on the next half cycle the other two conduct, so current flows through the load in the same direction both times. That is why a complete bridge gives full wave output without needing a centre-tap transformer. The price is extra voltage drop: in a bridge the current always passes through two silicon diodes in series, so the output peak is about 1.4 V below the input peak, compared with about 0.7 V for a single diode. If one diode of a bridge is open or removed, only one pair can conduct, and the circuit behaves like a half wave rectifier. Showing this is a neat way to compare the two kinds of rectifier on a single board.
Make it yourself
Make a bridge rectifier that switches between half and full wave yourself
Everything you need and the order to do it in. Tick off the materials as you collect them.
What you need 7
Step by step 9 steps
Lay the four diodes out as a diamond on the board and mark the two AC input corners and the positive and negative output corners.
Solder the diodes so that two striped ends meet at the positive output and two plain ends meet at the negative output.
Put the slide switch in series with one of the diodes, so that diode can be cut out of the bridge.
Connect the load resistor, and the LED with its resistor, across the output.
Check every diode's direction, then let an adult connect the AC adapter and plug it in.
With the switch closed, measure the DC output: all four diodes work and the bridge gives full wave output.
Unplug, open the switch, then power it again and measure: with one diode out, one half of each cycle has no path, so the output becomes half wave.
Add the capacitor (stripe to negative) and compare the two modes again.
In your file, draw which pair of diodes conducts in each half cycle, in both modes.
Read this first
Safety first
Go through these points before you build or switch anything on. Younger students should do this with an adult.
- Only a ready-made low-voltage AC adapter is used, plugged in by an adult; never connect the board to mains.
- Unplug the adapter before soldering or changing any part.
- Fit the electrolytic capacitor the right way round.
- Solder only with an adult, and do not hold the iron on a diode's leg for long.
Troubleshooting
If something does not work
The usual problems with this kit and how to fix them. Open a problem to see the fix.
The output is half wave even with the switch closed
One of the other diodes is reversed or open. Test each one with the multimeter's diode range.
The adapter or a diode gets hot
A diode is reversed and is shorting the supply. Unplug at once and check all four directions.
Opening the switch makes no difference
The switch may be in the wrong wire or bridged by solder. Check that it breaks the path of one diode only.
Exhibition day
How to present it
A running order for the exhibition table or the practical, step by step.
Before the exam, confirm from your board whether the circuit gives half wave or full wave output, and say so clearly.
Draw the current path for each half cycle in two different colours on your chart.
Explain why the output of a bridge is about 1.4 V lower than the input peak.
Keep your circuit diagram and the actual board side by side for the examiner.
Practice
Viva questions
Practice questions on this kit, with short answers. Try each one aloud before you open the answer.
How many diodes conduct at a time in a bridge rectifier?
Two diodes conduct together in each half cycle, while the other two are reverse biased.
What happens if one diode of a bridge rectifier is open?
Only one pair can conduct, so the circuit gives a half wave output instead of full wave.
Why is the voltage drop larger in a bridge rectifier?
Because the current passes through two diodes in series, each dropping about 0.7 V for silicon, so about 1.4 V is lost.
What is the main advantage of a bridge over a centre-tap rectifier?
It gives full wave rectification without a centre-tap transformer, and each diode faces a peak inverse voltage of only Vm instead of 2Vm.
Project file
Project file outline
The headings of the project file, in order. Give each heading its own section and write it in your own words.
The listing includes a printed project report: use this outline to check that your own file covers every part.
Free ebook: Writing a Science Project FileContents
- Aim: to compare full wave and half wave output from a bridge rectifier
- How a bridge of four diodes rectifies both half cycles
- What happens to a bridge when one diode fails
- Circuit diagrams for both modes, with the conducting diodes marked
- Observation table: DC output with four diodes and with one removed
- Comparison with a single-diode half wave rectifier
- Voltage lost across two diodes in a bridge
- Precautions while switching between modes, and conclusion
Buying checklist
Before you buy
What to check before you order the kit.
1Check these first
- The title mixes half wave and bridge, so read the listing and look at the board to see which output your circuit is meant to give.
- The listing says a board and a report are included; check that the report matches the circuit you actually build.
- See whether an AC supply is needed, and plan for an adult to provide a low-voltage AC adapter.
- Test the circuit with an adult a few days before your viva.
- Keep the box for transport and storage.
- Check the delivery date for your PIN code on the marketplace, and order well before the exhibition or practical.
- The project report is a learning aid. Read it, understand how the model works, and write your own observations; schools expect your own work.
Next steps
Take it further
Ways to turn this kit into a bigger investigation or a stronger exhibition entry.
View both modes on an oscilloscope in the school lab and sketch them.
Measure the forward voltage across a conducting diode and explain why a bridge loses about twice as much as one diode.
Explain how a technician could spot a failed bridge diode from the output alone.
Audience
Who it suits
Class 12 physics investigatory projects and practicals on rectifiers, and basic electronics labs in diploma courses.
- ClassClass 10 to 12
- SubjectPhysics
- TypeDIY kit
- Project reportPrinted report included
Free to read
Free ebooks for this topic
Free PDF ebooks from Gurukul Technicals Institute on the science, the making and the presenting of projects like this one.
- Free PDF ebook
Electricity and Magnetism Experiments
Hands-on experiments with cells, wires, bulbs and magnets
- Free PDF ebook
Physics Working Models Explained
Twenty classic models, how each works and how to make it
- Free PDF ebook
Investigatory Projects for Class 11 and 12
Topics, method and report structure for physics, chemistry and biology
- Free PDF ebook
Your Science Exhibition Guide
Choose a project, build it, present it and answer the judges with confidence