Head office, Rana Pratap Bagh, Delhi011 2721 1512+91 97116 99511

Design & Digital Skills

CorelDRAW

Drawing logos, banners, visiting cards and signboards that print sharply at any size.

Suits: Students and small businesses who make print material

Duration, fees and batch timings are quoted by the head office or your centre.
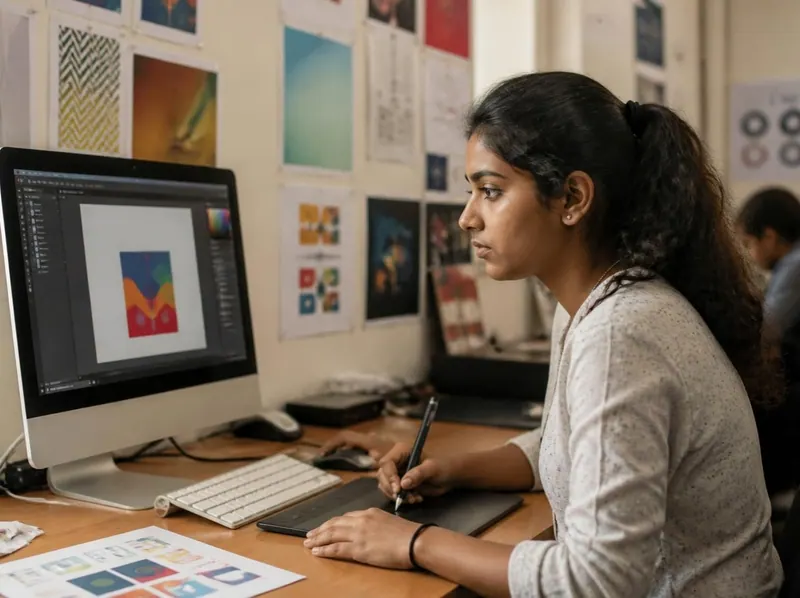
A student designing a poster layout on a computer with a graphics tablet, sample prints on the wall behind

The study book of this course

  • DTP and CorelDRAW
Lessons
7
Practice questions
35
Free ebooks
4

About the course

What the CorelDRAW course is about

CorelDRAW is a vector drawing program widely used in print shops for logos, banners, visiting cards and signboards. Because it draws in vectors, a design prints sharply at any size, from a card to a hoarding.

The course covers the CorelDRAW workspace and tools and working with objects, with the design basics behind good print work: layout, typography, colour models and resolution.

What you will practise

Drawn from the lessons of the study books below.

  1. 01

    Find your way around the CorelDRAW workspace and save .cdr files

  2. 02

    Draw with the Rectangle, Ellipse and Text tools and edit nodes with the Shape tool

  3. 03

    Duplicate, group, combine, weld, trim and PowerClip objects

  4. 04

    Set fills and outlines from the colour palette, and convert text to curves

  5. 05

    Work in CMYK at the right resolution for print

  6. 06

    Set up a visiting card and a poster with bleed and export a print-ready PDF

What you will learn

7 lessons, 21 exercises

Every lesson of the study book that comes with this course in the student portal, with the key points of each lesson and exercises to try. Your centre gives you the syllabus, the duration and the fee.

Study book

DTP and CorelDRAW

Learn desktop publishing from the ground up: page layout, typography, RGB and CMYK colour, print resolution, vector and raster graphics, the core CorelDRAW tools, and a visiting card and poster workflow ending in a print-ready PDF.

  • 7 lessons
  • About 27 min of reading
  • 35 practice questions
  • 25 key terms
  1. 1What DTP Is and Page Layout Basics3 min read · 5 key points · 3 exercises

    Key points

    • DTP combines text, images and shapes into designs for print and screen.
    • A4 is 210 × 297 mm; folding A3 in half gives A4.
    • Bleed extends edge-to-edge colour past the trim line, commonly by about 3 mm.
    • Keep important text inside the safe area, away from the trim line.
    • Hierarchy, alignment, proximity, white space and contrast make a layout work.

    Try this

    1. Collect five printed items from home, such as a visiting card, a pamphlet and a wedding card, measure each with a ruler and note its size in millimetres and its orientation.
    2. Fold an A3 sheet in half and then in half again, measure the sheet after each fold to confirm the A4 and A5 sizes, and record the dimensions in a table.
    3. Choose one pamphlet or poster and mark its hierarchy, alignment, margins and white space on a printout or photo of it, then write two ways its layout could be improved.
  2. 2Typography for DTP4 min read · 5 key points · 3 exercises

    Key points

    • Serif fonts have small strokes at letter ends; sans serif fonts do not.
    • Type is measured in points, and 72 points make one inch.
    • Leading is line spacing, kerning is space between two letters, tracking is overall spacing.
    • Use two or three typefaces at most in one design.
    • Use Unicode fonts such as Nirmala UI or Mangal for Hindi.

    Try this

    1. Type the same passage of two or three paragraphs at 11 pt in a serif font such as Times New Roman and in a sans serif font such as Arial, print both and compare which is easier to read.
    2. Type the word WAVE in large capitals, print it and mark the letter pairs whose gaps look uneven, such as W and A or A and V, then set a short paragraph at three different line spacings and note which leading reads most comfortably.
    3. Switch to the Windows Hindi keyboard with Windows key + Space (add Hindi in Windows Settings first if it is missing), type your name and address in a Unicode font such as Nirmala UI, then paste the text into Notepad and check that it still shows correctly.
  3. 3Colour Models and Resolution for Print4 min read · 5 key points · 3 exercises

    Key points

    • RGB mixes light for screens; CMYK mixes inks for print.
    • K in CMYK stands for key, which is black.
    • Set print documents to CMYK and small black text to 100% K only.
    • Print images should be about 300 DPI at their final size.
    • Pixels needed = print size in inches × resolution.

    Try this

    1. Make a colour chart in CorelDRAW of ten filled squares with each square's CMYK values typed beneath it, such as C0 M100 Y100 K0, then print it and compare the printout with the screen.
    2. Calculate the pixels needed at 300 DPI for a 3.5 by 2 inch visiting card, a 5 by 7 inch photo and an A4 flyer of about 8.3 by 11.7 inches, and write the answers in a table.
    3. Check the pixel size of three photos on your phone or computer from their file details, and work out the largest size in inches each could be printed at 300 DPI.
  4. 4Vector and Raster Graphics4 min read · 5 key points · 3 exercises

    Key points

    • Raster images are made of pixels and lose quality when enlarged.
    • Vector graphics are made of paths and stay sharp at any size.
    • Use vector for logos and text, raster for photographs.
    • PNG supports transparency; JPG uses lossy compression and has none.
    • PowerTRACE converts a bitmap into editable curves.

    Try this

    1. Draw a simple logo with shapes and text in CorelDRAW, make a copy of it and turn the copy into a low-resolution bitmap with Convert to Bitmap, then zoom in on both to compare the edges of the raster and vector versions.
    2. Export the same logo as a JPG and as a PNG with a transparent background, bring both back in with File > Import (Ctrl+I), place them on a coloured rectangle, and note which one shows a white box around it.
    3. Import a simple bitmap logo with File > Import (Ctrl+I), trace it with PowerTRACE from Trace Bitmap on the property bar, clean up any rough nodes with the Shape tool, and compare the result with the original.
  5. 5The CorelDRAW Workspace and Basic Tools4 min read · 5 key points · 3 exercises

    Key points

    • CorelDRAW saves files with the .cdr extension.
    • Pick selects and transforms objects; Shape (F10) edits nodes.
    • Rectangle is F6, Ellipse F7 and Text F8; hold Ctrl for a square or circle.
    • Left-click a palette colour for the fill and right-click for the outline.
    • Ctrl+Q converts a shape or text to curves.

    Try this

    1. Create a new A4 CMYK document with File > New, draw a perfect square and a perfect circle by holding Ctrl with the Rectangle (F6) and Ellipse (F7) tools, and give each a different fill and outline from the palette.
    2. Draw a rectangle with rounded corners and an ellipse changed into a pie, then convert a copy of each to curves with Ctrl+Q and reshape it by adding and deleting nodes with the Shape tool.
    3. Add an artistic text heading and a paragraph text frame holding three lines of text, set the outline width of a shape on the property bar, and save the file as a .cdr with Ctrl+S.
  6. 6Working with Objects in CorelDRAW4 min read · 5 key points · 3 exercises

    Key points

    • Ctrl+D duplicates, Ctrl+G groups and Ctrl+U ungroups.
    • Combine (Ctrl+L) makes one curve object with a single fill and outline.
    • Shift+Page Up and Shift+Page Down send an object to the front or back of its layer.
    • Weld, Trim and Intersect build new shapes from overlapping objects.
    • PowerClip places an object inside a frame without cutting it.

    Try this

    1. Draw three circles and a rectangle at different places on the page, line up their tops with T and space them evenly from left to right with Align and Distribute, then group them with Ctrl+G and centre the group on the page with P.
    2. Build a simple logo by welding two overlapping circles, trimming one shape with another and making a new shape with Intersect, then group the finished logo with Ctrl+G.
    3. Place a photo inside a circle with Object > PowerClip > Place Inside Frame, lock a background rectangle, and rename the photo, circle and background in the Objects docker.
  7. 7Visiting Card and Poster Workflow, and PDF Export for Print4 min read · 5 key points · 3 exercises

    Key points

    • Set up the page size, CMYK colour mode and bleed before designing.
    • Keep text inside the safe area and proof at 100% size.
    • Embed fonts or convert text to curves before sending a job.
    • Export with a print preset such as Prepress or PDF/X.
    • Send the printer a checked PDF, not the .cdr file, unless asked.

    Try this

    1. Design a visiting card for an imaginary shop at 3.5 by 2 inches in CMYK with a 3 mm bleed and safe-area guidelines, then print it at 100% size on plain paper and check every detail.
    2. Design an A3 poster for an imaginary event with a headline, one photo placed with PowerClip, the date, time, place and phone number, and a clear call to action, using no more than two typefaces.
    3. Export your visiting card with File > Publish to PDF using a Prepress or PDF/X preset with bleed and crop marks, then open the PDF at 100% and check the fonts, colours and trim.
Glossary: 25 key terms of DTP and CorelDRAW
Bleed
Background colour or artwork extended past the trim line, commonly by about 3 mm, so that no white strip shows if the cut is slightly off.
CMYK
The subtractive colour model used for printing, which mixes cyan, magenta, yellow and key (black) inks given as percentages.
Convert to Curves
A CorelDRAW command, Ctrl+Q, that turns a shape or text into a curve object whose nodes can be edited freely.
Crop marks
Short lines printed just outside the page area that show the cutter exactly where to trim the paper.
Desktop publishing (DTP)
Designing printed and digital material on a computer by arranging text, images and shapes on a page.
DPI
Dots per inch: strictly, how many ink dots a printer places in one inch, but commonly used in print shops to mean pixels per inch (PPI), how many pixels of an image fit into one inch.
Gamut
The full range of colours that a device, such as a monitor or a printing press, can reproduce.
Kerning
Adjusting the space between two particular letters, such as A and V, so that the gap looks even.
Leading
The distance from one line of text to the next, also called line spacing.
Node
A point on a vector path that controls where its lines and curves run and that can be moved with the Shape tool.
Pixel
One of the tiny single-coloured squares in the grid that makes up a raster image.
Point (pt)
The unit used to measure type size, with 72 points making one inch in DTP software.
PowerClip
A CorelDRAW feature that places one object, such as a photo, inside another object that acts as a frame, without cutting it.
PowerTRACE
The CorelDRAW feature that traces a bitmap image and converts it into editable vector curves.
Raster graphic
An image made of a grid of pixels, such as a photo, that becomes blurred or blocky when it is enlarged.
Resolution
The number of pixels that fit into one inch of an image, written as PPI or DPI, which decides how sharp it looks when printed.
RGB
The additive colour model used by screens, which mixes red, green and blue light, each usually given a value from 0 to 255.
Safe area
The zone a few millimetres inside the trim line where important text is kept so that it is never cut off.
Serif
A small stroke at the end of a letter's main strokes, found in fonts such as Times New Roman but not in sans serif fonts such as Arial.
Spot colour
A premixed ink, such as a Pantone colour, that printers use when a colour such as a brand colour must match exactly.
Tracking
Adjusting the spacing evenly across a whole word, line or paragraph of text.
Trim line
The line along which a printed sheet is cut to its finished size.
Typeface
A design of letters, such as Arial or Times New Roman, also called a font family, in which each style and weight is a separate font.
Vector graphic
An image built from paths of lines and curves defined by nodes, which stays sharp at any size, such as a logo saved as CDR, AI or SVG.
Weld
A CorelDRAW shaping command that joins overlapping objects into one shape with a single outline.

Practice and study material

Study books and timed practice tests in the student portal

Students sign in to read the study books lesson by lesson, print them, mark lessons as done and test themselves with timed practice tests, every answer explained.

  • 1study book
  • 7lessons
  • 35practice questions
  • 25glossary terms

How the practice tests work

  • Fresh questions each time

    Up to 20 questions are picked at random from the subject’s question bank.

  • One minute per question

    A timer counts down. When it reaches zero, your answers are sent automatically.

  • Move around freely

    Skip a question, flag it, and come back to change your answer before you submit.

  • Learn from every answer

    At the end you see the right answer and an explanation for each question.

  • Read, print and keep track

    Each study book has its lessons, key points, exercises and a glossary. Print a lesson, or mark it as done.

Try 3 practice questions

Real questions from this course’s question banks. Pick an answer to see the explanation.

  1. DTP and CorelDRAW · Question 1

    Adjusting the space between two particular letters, such as A and V, is called:

    Show the answer

    Answer: A. Kerning

    Kerning adjusts one pair of letters; tracking adjusts spacing evenly across a whole word or line.

  2. DTP and CorelDRAW · Question 2

    A logo must print sharply on both a visiting card and a large hoarding. Which kind of graphic should it be?

    Show the answer

    Answer: D. Vector

    Vector graphics are resolution-independent and stay sharp at any size.

  3. DTP and CorelDRAW · Question 3

    What is PowerClip used for?

    Show the answer

    Answer: A. Placing one object inside another that acts as a frame

    PowerClip shows an object, such as a photo, only within a frame shape without cutting it.

Free ebooks

4 free ebooks for this course

Branded PDF books to read on your phone or print: the study books of this course and more. Free for anyone, no sign-in needed.

Careers

Careers this course leads towards

The kind of work these skills are used for. Each guide explains what the job involves, the skills it asks for and how to get started.

How admission works

From your first question to your certificate.

The usual steps, at the head office in Delhi or at an authorised member centre.

Who can join
Students above 12 years of age.
Where
The Delhi head office and authorised member centres.
Fees and timings
On WhatsApp at +91 97116 99511, or by phone on 011 2721 1512.
Start with a question
  1. 1

    Ask about the course

    Call or WhatsApp the head office, or visit your nearest member centre. Ask for the duration, the fee and the batch timings in writing.

  2. 2

    Fill the admission form

    Admission forms are supplied by the head office to every centre.

  3. 3

    Learn in class

    Attend your batch at the centre, with the course material and study notes, and sign in to the student portal for the study books and practice tests.

  4. 4

    Take the exam

    The institute prefers written exams, taken in front of a teacher.

  5. 5

    Receive your certificate

    Students who pass get a Gurukul Technicals Institute certificate and marksheet. Employers can verify it with the head office.

Questions

Questions about the CorelDRAW course

Still have a question?

Chat on WhatsApp
Who can join the CorelDRAW course?

Students above 12 years of age can take admission, at the Delhi head office or at an authorised member centre. The course suits students and small businesses who make print material. Tell the head office or your centre what you already know, and they will suggest where to start.

How long is the course and what is the fee?

Duration, fees and batch timings depend on the course and the centre. Ask the head office or your nearest member centre, and get the details in writing before you pay.

Where are the classes?

At the head office in Delhi (A-10, Chief Commissioner Colony, opposite Rana Pratap Bagh) and at authorised member centres. Call or WhatsApp the head office to find the nearest centre.

What do I need to use the study books and practice tests?

A phone or a computer with an internet connection, and the login your centre gives you at enrolment. The student portal opens in an ordinary web browser, so there is nothing to install. Student login.

How do the practice tests work?

Sign in to the student portal and choose a subject. Each test picks up to 20 questions at random from that subject’s question bank and gives you one minute per question, with a timer that sends your answers automatically when it reaches zero. You can skip a question, flag it and come back before you submit, and at the end you see the right answer and an explanation for every question. This course has 35 practice questions across 1 subject, and you can take the tests as often as you like.

Is there an exam and a certificate?

Yes. The institute prefers written exams, taken in front of a teacher. Students who pass receive a Gurukul Technicals Institute certificate and marksheet.

How is a Gurukul Technicals Institute certificate verified?

On the verify certificate page, anyone can enter a certificate number and check it against the institute’s online register, which covers certificates issued through the portal. For older certificates, or if there is any doubt, send a copy to the head office by email or WhatsApp; the reply comes within 2 working days.

Are the ebooks on this page really free?

Yes. The 4 ebooks for this course are free PDF downloads for anyone, whether or not you join. The whole library has 100 free ebooks: browse them all.

Ready to start the CorelDRAW course?

Ask the head office for the duration, the fee, the batch timings and your nearest member centre.

WhatsApp us