- Physics
- Ready-made model
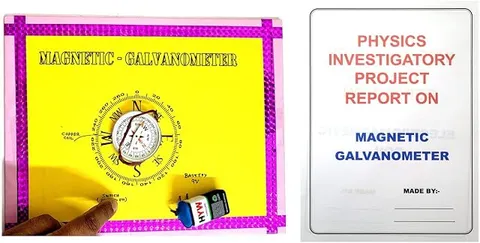
Magnetic Galvanometer Working Model
Code B0G2T6HCYC
- Paid for and delivered by Amazon. The current price and the delivery date for your PIN code are shown there.
- Sold by Gurukul Technicals Institute, Delhi.
- Need a different topic, a custom version or a school order? Ask on WhatsApp.
In this project guide
Ready-made model
About this model
This working model demonstrates a galvanometer, the instrument used to detect small electric currents through their magnetic effect. It shows how a current produces a magnetic force strong enough to move a pointer or needle, and how the direction of that movement tells you the direction of the current.
What the listing says
- Electromagnetism & Current Detection Project
How it works
The science behind it
The idea the model demonstrates, in words you can use in your report and when you explain it.
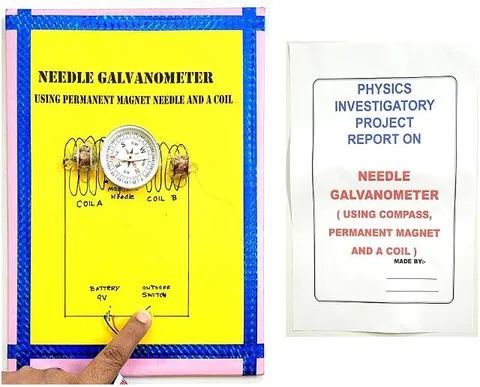
A galvanometer works because a current-carrying conductor in a magnetic field experiences a force. In a moving-coil galvanometer, a rectangular coil hangs between the poles of a permanent magnet. When a current I flows, the coil feels a torque τ = NIAB, where N is the number of turns, A the area of the coil and B the magnetic field. A spring opposes the turning, and with curved pole pieces giving a radial field, the coil settles at an angle proportional to the current, shown by a pointer. Reverse the current and the pointer swings the other way, which is why a galvanometer has its zero in the middle of the scale. Simpler models use a magnetic needle deflected by the coil's field instead. A galvanometer becomes an ammeter when a low resistance (a shunt) is connected in parallel with it, and a voltmeter when a high resistance is connected in series.
Make it yourself
Make a moving coil galvanometer model yourself
Build your own version from scratch, or use the steps to understand how the ready-made model is put together before you present it.
What you need 8
Step by step 8 steps
Wind 50 to 100 turns of the thin wire on the matchbox tray, slide the coil off, and tape it so it keeps its rectangular shape. Leave long free ends.
Scrape the enamel off the last 2 cm of each end.
Fix the magnets on the blocks facing each other, north towards south, with a gap just wide enough for the coil to turn freely.
Hang the coil from the stand by the thread so it sits between the magnets, turned so the magnetic field runs along the flat face of the coil rather than through it.
Fix the straw pointer to the top of the coil and set the card scale behind it, with zero where the pointer rests.
Bring the two coil wires down loosely to two terminals on the base; they also act as gentle springs that pull the coil back to zero.
Connect the cell, the 1 kΩ resistor and the push switch in series with the coil. Press the switch and the pointer moves; reverse the cell and it moves the other way.
Try a smaller resistor to see a bigger deflection, and mark the scale.
Read this first
Safety first
Go through these points before you build or switch anything on. Younger students should do this with an adult.
- Always keep a resistor in series with the coil; thin wire connected straight across a cell is nearly a short circuit and heats up.
- Neodymium magnets snap together hard and can pinch fingers; handle them one at a time and keep them away from phones, cards and young children.
- Use one or two cells only.
- Remove enamel with sandpaper; cutting tools and hot glue need an adult.
Troubleshooting
If something does not work
The usual problems with this model and how to fix them. Open a problem to see the fix.
The pointer does not move
Check that the enamel is fully scraped at every joint and that the coil shows continuity. Make sure the coil is not touching a magnet.
The pointer swings to and fro for a long time
There is little damping. Stick a small card vane on the pointer so air slows it, or wait for it to settle; real galvanometers use damping for the same reason.
The coil turns but does not come back to zero
The wires are too stiff or the thread is twisted. Use longer, looser wires and let the thread untwist before testing.
The deflection is tiny
Use stronger magnets, a smaller gap, more turns or a smaller series resistor, and check that the field runs along the face of the coil.
Exhibition day
How to present it
A running order for the exhibition table or the practical, step by step.
Pass a small current one way and then the other, and show the pointer swinging to both sides of zero.
Explain the torque formula on a chart and say which factors make the galvanometer more sensitive.
Show with a simple diagram how a galvanometer is turned into an ammeter or a voltmeter.
Use a low-voltage cell and a resistor so the current stays small and the deflection stays on the scale.
Practice
Viva questions
Practice questions on this model, with short answers. Try each one aloud before you open the answer.
What is a galvanometer?
It is an instrument used to detect the presence, direction and relative size of small electric currents.
On what principle does a moving-coil galvanometer work?
A current-carrying coil placed in a magnetic field experiences a torque that turns it.
How is a galvanometer converted into an ammeter?
By connecting a low resistance, called a shunt, in parallel with it.
How is a galvanometer converted into a voltmeter?
By connecting a high resistance in series with it.
Project file
Project file outline
The headings of the project file, in order. Give each heading its own section and write it in your own words.
Free ebook: Writing a Science Project FileContents
- Aim: to make a galvanometer that detects a small current and shows its direction
- Introduction: what a galvanometer is and where it is used
- Materials and labelled diagram of the coil, magnets and pointer
- Principle: the torque on a current-carrying coil in a magnetic field, τ = NIAB
- The roles of the restoring spring, the pointer and the centre-zero scale
- Procedure: winding, hanging and testing the coil
- Observations: deflection with different resistors and with the current reversed (table)
- Converting a galvanometer into an ammeter and a voltmeter
- Conclusion and precautions for using strong magnets
Buying checklist
Before you buy
What to check before you order the model, and what to do when it arrives.
1Before you order
- Check that it fits your chapter: magnetic effects of current, or the moving coil galvanometer in Class 12.
- Read the listing for anything you must supply, such as cells.
- Keep it away from strong magnets and phones in transport, and keep the box.
- Practise showing that reversing the current reverses the deflection.
- Check the delivery date for your PIN code on the marketplace, and order well before the exhibition or practical.
2When it arrives
- On arrival, check that the pointer moves freely and returns to zero, and test again a few days before the exhibition.
Next steps
Take it further
Ways to turn this model into a bigger investigation or a stronger exhibition entry.
Calibrate the scale by putting a multimeter in series and noting the current at each mark.
Turn it into a simple voltmeter with a known high resistance in series, and test it on one and two cells.
Use it to detect the tiny current from a lemon cell, or from a magnet pushed into a separate coil.
Audience
Who it suits
Suits Class 10 to 12 physics projects on the magnetic effect of current and moving-coil instruments.
- SubjectPhysics
- TypeReady-made model
Free to read
Free ebooks for this topic
Free PDF ebooks from Gurukul Technicals Institute on the science, the making and the presenting of projects like this one.
- Free PDF ebook
Electricity and Magnetism Experiments
Hands-on experiments with cells, wires, bulbs and magnets
- Free PDF ebook
Physics Working Models Explained
Twenty classic models, how each works and how to make it
- Free PDF ebook
Your Science Exhibition Guide
Choose a project, build it, present it and answer the judges with confidence
- Free PDF ebook
Writing a Science Project File
How to write the report, from the cover page to the bibliography