- Physics
- Ready-made model
- Class 1 to 9
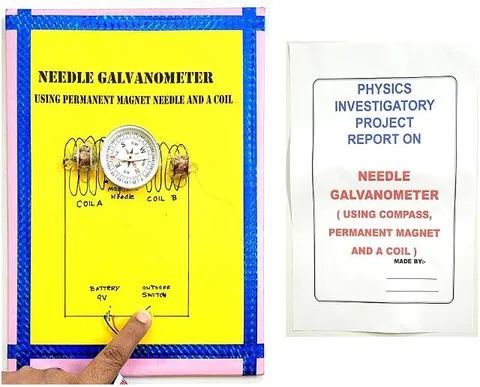
Needle Galvanometer Using Compass and Copper Coil Project Model Educational Electronic Hobby Kit
Code B0DTYBTWH3
- Paid for and delivered by Amazon. The current price and the delivery date for your PIN code are shown there.
- Sold by Gurukul Technicals Institute, Delhi.
- Need a different topic, a custom version or a school order? Ask on WhatsApp.
In this project guide
Ready-made model
About this model
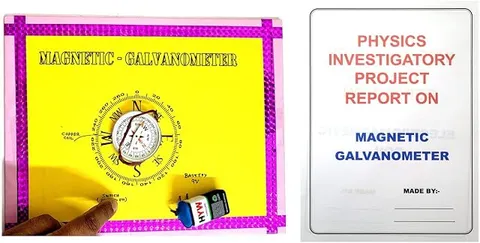
This model is a simple needle galvanometer made from a magnetic compass and a coil of copper wire. When current flows through the coil, the compass needle turns, giving direct, visible proof that an electric current produces a magnetic field. It recreates the famous discovery of Hans Christian Oersted.
How it works
The science behind it
The idea the model demonstrates, in words you can use in your report and when you explain it.
In 1820 Hans Christian Oersted noticed that a compass needle moved when current flowed in a nearby wire, showing that an electric current produces a magnetic field around it. In this galvanometer the coil is set along the north-south line, so that with no current the needle rests along the plane of the coil. When current flows, the coil's magnetic field at the centre acts at right angles to the earth's horizontal field, and the needle turns to point along their resultant. A larger current gives a larger deflection, and reversing the current turns the needle the other way. Winding more turns makes the instrument more sensitive, because the field at the centre of a circular coil is B = μ₀NI/2r. The tangent galvanometer used in older college labs is the accurate form of this device, in which the current is proportional to tan θ.
Make it yourself
Make a compass needle galvanometer yourself
Build your own version from scratch, or use the steps to understand how the ready-made model is put together before you present it.
What you need 8
Step by step 8 steps
Wind 20 to 50 turns of wire around the frame, leaving long ends, and tape the turns together.
Scrape the enamel off the wire ends with sandpaper.
Fix the compass at the centre of the coil, resting on the degree scale.
With no current, turn the whole base until the compass needle lies along the plane of the coil (north-south). Keep steel tools and magnets away.
Connect the cell, the resistor and the push switch in series with the coil.
- Press the switch
The needle turns. Read the angle on the scale.
- Reverse the cell
The needle turns the other way, showing that the current's direction has changed.
Try more turns, a smaller resistor or two cells in series, and record the deflection each time.
Read this first
Safety first
Go through these points before you build or switch anything on. Younger students should do this with an adult.
- Always keep the resistor in series and press the switch only briefly; the coil is nearly a short circuit and warms the wire and cell.
- Use one or two 1.5 V cells, never a bigger battery.
- Keep the compass away from magnets, phones and steel objects, which can disturb or weaken it.
- Remove enamel with sandpaper, not a blade.
Troubleshooting
If something does not work
The usual problems with this model and how to fix them. Open a problem to see the fix.
The needle does not move
Scrape the wire ends again, check the switch and cell, and test the coil for continuity with a multimeter.
The needle moves even with no current
A steel object, a magnet or a nearby wire carrying current is disturbing it. Clear the table and line the coil up north-south again.
The deflection is very small
Add more turns, use a smaller resistor or two cells, and place the compass exactly at the centre of the coil.
The needle swings round to 90 degrees and stays there
The current is so large that the coil's field swamps the earth's. Use a bigger resistor so the deflection stays between about 30 and 60 degrees, where it is easiest to read.
Exhibition day
How to present it
A running order for the exhibition table or the practical, step by step.
Before switching on, turn the model so the coil lies along the north-south line shown by the needle.
Switch the current on and off and let judges watch the needle jump; then reverse the battery.
Keep phones, keys and steel objects away from the compass during the demonstration.
Tell the story of Oersted's 1820 discovery in two or three lines to set the scene.
Practice
Viva questions
Practice questions on this model, with short answers. Try each one aloud before you open the answer.
Who discovered the magnetic effect of electric current?
Hans Christian Oersted, in 1820, when he saw a compass needle deflect near a current-carrying wire.
Why is the coil placed along the north-south direction?
So that the coil's field is at right angles to the earth's horizontal field, which makes the tangent law, I ∝ tan θ, apply.
What happens to the deflection if the current is reversed?
The needle deflects in the opposite direction.
How can the sensitivity of this galvanometer be increased?
By increasing the number of turns in the coil or reducing its radius, which increases the magnetic field at the centre.
Project file
Project file outline
The headings of the project file, in order. Give each heading its own section and write it in your own words.
Free ebook: Writing a Science Project FileContents
- Aim: to show that an electric current produces a magnetic field, using a compass and a coil
- Introduction: Oersted's discovery of 1820
- Materials and labelled diagram of the coil and compass
- Principle: the needle points along the resultant of the coil's field and the earth's horizontal field
- Procedure, including lining the coil up north-south
- Observations: deflection with different numbers of turns, currents and directions (table)
- Galvanometers, ammeters and their uses
- Conclusion, precautions and sources of error
Buying checklist
Before you buy
What to check before you order the model, and what to do when it arrives.
1Before you order
- Check that it fits your class: magnetic effects of current, or the tangent galvanometer in senior classes.
- Read the listing for the power source and whether a cell is included.
- Practise lining the coil up north-south before the exhibition, as steel tables in the hall may disturb the needle.
- Keep the model away from magnets in your bag.
- Check the delivery date for your PIN code on the marketplace, and order well before the exhibition or practical.
2When it arrives
- On arrival, check that the compass needle swings freely and points north when no current flows.
Next steps
Take it further
Ways to turn this model into a bigger investigation or a stronger exhibition entry.
Plot tan θ against the current (measured with a multimeter) and check whether it is a straight line, as the tangent galvanometer formula predicts.
Compare the deflection with 10, 20 and 40 turns at the same current.
Use the model to detect the current from a fruit cell, or from a magnet moved in and out of another coil.
Audience
Who it suits
Suits Class 8 to 12 science exhibitions on the magnetic effect of current, and Class 12 projects on the tangent galvanometer.
- ClassClass 1 to 9
- SubjectPhysics
- TypeReady-made model
Free to read
Free ebooks for this topic
Free PDF ebooks from Gurukul Technicals Institute on the science, the making and the presenting of projects like this one.
- Free PDF ebook
Physics Working Models Explained
Twenty classic models, how each works and how to make it
- Free PDF ebook
Your Science Exhibition Guide
Choose a project, build it, present it and answer the judges with confidence
- Free PDF ebook
Writing a Science Project File
How to write the report, from the cover page to the bibliography
- Free PDF ebook
Viva Questions for Science Projects
How to answer examiner questions, with sample questions for popular projects