- Physics
- Ready-made model
- Class 1 to 9
Low Cost Motorized Electric Bell Project Model Value for Money Educational Electronic Hobby Kit
Code B0DTY7F8HV
- Paid for and delivered by Amazon. The current price and the delivery date for your PIN code are shown there.
- Sold by Gurukul Technicals Institute, Delhi.
- Need a different topic, a custom version or a school order? Ask on WhatsApp.
In this project guide
Ready-made model
About this model
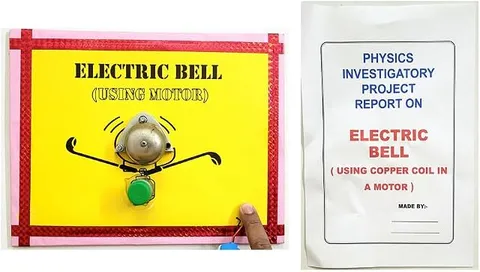
This model is an electric bell in which a motor, instead of the usual electromagnet, drives the striker that rings the bell. It shows two energy changes in one simple device: electrical energy into motion, and motion into sound.
How it works
The science behind it
The idea the model demonstrates, in words you can use in your report and when you explain it.
In a motorised bell, a DC motor does the work. Current through the motor's coil, placed in a magnetic field, produces a force that makes it turn; this is the motor effect, and Fleming's left-hand rule gives its direction. The turning shaft makes a striker hit the bell again and again. Each hit sets the metal vibrating, and the vibrations push and pull on the air, sending out sound as a longitudinal wave of compressions and rarefactions. Sound needs a medium and travels through air at about 340 m/s. The pitch depends on the frequency of vibration and the loudness on its amplitude. The traditional electric bell uses an electromagnet with a make-and-break contact instead, but the motorised design is simpler to build. School bells and the brass bells in Indian temples make sound the same way: a metal body is struck and set vibrating.
Make it yourself
Make a motor-driven electric bell yourself
Build your own version from scratch, or use the steps to understand how the ready-made model is put together before you present it.
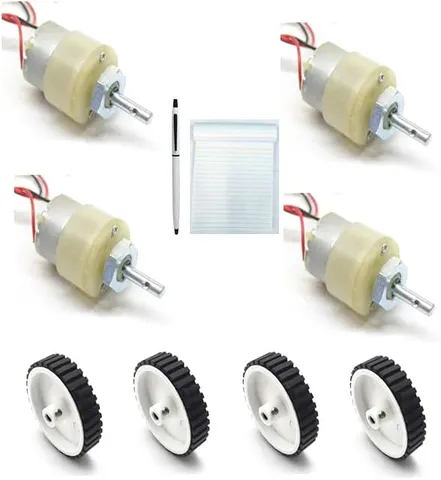
What you need 8
Step by step 7 steps
Fix the bell dome on a single bolt or block at one end of the base, so it can ring freely without touching the base.
Mount the motor on its raised block with the shaft pointing towards the bell, so the shaft end sits a few centimetres from the bell's rim.
Tie a short length of thread to the shaft, or fix a stub of stiff wire to it, and fasten the nut at its free end as the striker.
Adjust the length so the spinning nut just clips the rim: too long and it tangles, too short and it misses.
Connect the motor, the push button and the cell holder in series.
- Press the button
The motor spins, the nut hits the bell on every turn and the bell rings until you let go.
Label the base with the energy changes: chemical energy in the cells, electrical energy in the wires, kinetic energy of the motor and sound from the bell.
Read this first
Safety first
Go through these points before you build or switch anything on. Younger students should do this with an adult.
- Keep fingers, hair and loose sleeves away from the spinning striker.
- Fix the motor firmly; a loose motor can jump off its block when it starts.
- Do not ring it right next to anyone's ear; a metal bell struck close by is very loud.
- Use glue and any cutter only with an adult's help.
Troubleshooting
If something does not work
The usual problems with this model and how to fix them. Open a problem to see the fix.
The motor spins but the bell does not ring
The striker is not reaching the rim. Lengthen the thread a little or move the bell closer, and check the bell is not resting on anything that stops it vibrating.
The thread wraps around the shaft and stops
It is too long or the weight is too light. Shorten it and use a heavier nut, so it flies out straight as the shaft turns.
The bell gives a dull clunk instead of a ring
The bell is held too tightly or is touching the base. Mount it on one bolt through its centre so it can vibrate freely.
The motor hums but does not turn
The striker may be jammed against the bell, or the cells are weak. Free the striker and fit fresh cells.
Exhibition day
How to present it
A running order for the exhibition table or the practical, step by step.
Switch the bell on and explain each energy change in order: electrical, mechanical, then sound.
Touch the bell lightly while it rings to show that stopping the vibration stops the sound.
Compare it with the classic electromagnetic bell using a simple diagram.
Explain how pitch and loudness are linked to frequency and amplitude.
Practice
Viva questions
Practice questions on this model, with short answers. Try each one aloud before you open the answer.
What energy changes take place in a motorised electric bell?
Electrical energy changes into mechanical energy in the motor, and then into sound energy when the bell vibrates.
What type of wave is sound in air?
A longitudinal wave, made up of compressions and rarefactions.
Why can sound not travel through a vacuum?
Sound needs a medium whose particles can vibrate, and a vacuum has none.
How does a traditional electric bell work?
An electromagnet pulls the hammer to strike the gong, which breaks the circuit; a spring pulls the hammer back, the circuit closes again and the cycle repeats.
Project file
Project file outline
The headings of the project file, in order. Give each heading its own section and write it in your own words.
Free ebook: Writing a Science Project FileContents
- Aim: to make an electric bell in which a DC motor drives the striker
- The motor effect and Fleming's left-hand rule
- Energy changes from the cells to sound
- Circuit diagram and labelled diagram of the bell
- How an electromagnet bell differs from this motor bell
- Observations: effect of striker length and cell voltage on the ringing
- Uses of bells: doorbells, school bells and alarms
- Precautions with the spinning striker, and conclusion
Buying checklist
Before you buy
What to check before you order the model.
1Check these first
- Check the class level in the listing and that it fits the chapter your teacher has set, such as sound or the magnetic effects of current.
- See whether the listing mentions batteries; keep fresh cells ready if it does not.
- Test it a few days early: press the button several times and check the striker reaches the bell every time.
- Keep the box, and wrap the bell and striker so they are not bent on the way to school.
- Check the delivery date for your PIN code on the marketplace, and order well before the exhibition or practical.
- Practise explaining it. Judges ask what the model shows and why; knowing the science matters as much as the model. The viva questions above are a good place to start.
Next steps
Take it further
Ways to turn this model into a bigger investigation or a stronger exhibition entry.
Compare the sound of bells made of steel, brass and glass and explain the difference in pitch.
Add a variable resistor to control the motor speed and record how the ringing rate changes.
Build a simple electromagnet bell beside it and compare the two designs in your viva.
Audience
Who it suits
Suits Class 5 to 9 science exhibitions on electricity, motors and sound.
- ClassClass 1 to 9
- SubjectPhysics
- TypeReady-made model
Free to read
Free ebooks for this topic
Free PDF ebooks from Gurukul Technicals Institute on the science, the making and the presenting of projects like this one.
- Free PDF ebook
Electricity and Magnetism Experiments
Hands-on experiments with cells, wires, bulbs and magnets
- Free PDF ebook
Physics Working Models Explained
Twenty classic models, how each works and how to make it
- Free PDF ebook
Your Science Exhibition Guide
Choose a project, build it, present it and answer the judges with confidence
- Free PDF ebook
Writing a Science Project File
How to write the report, from the cover page to the bibliography