- Physics
- Class 1 to 9
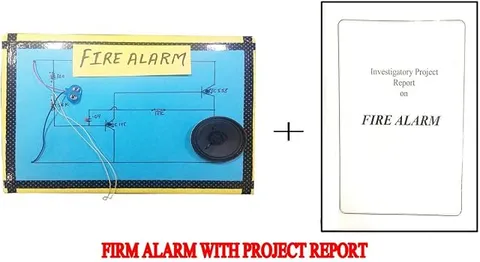
Fire Alarm Educational Circuit Board
Code B07H5PNLPC
- Paid for and delivered by Amazon. The current price and the delivery date for your PIN code are shown there.
- Sold by Gurukul Technicals Institute, Delhi.
- Need a different topic, a custom version or a school order? Ask on WhatsApp.
In this project guide
Physics
About this model
This circuit board demonstrates how a fire alarm detects danger and raises an alert. It helps students explain the chain of sense, decide and warn that every alarm system follows, and why an early warning saves lives.
How it works
The science behind it
The idea the model demonstrates, in words you can use in your report and when you explain it.
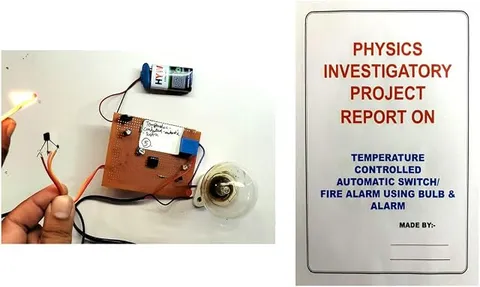
A fire needs three things, called the fire triangle: fuel, oxygen and heat. An alarm cannot see fire directly, so it detects one of the signs that come with it: a rise in temperature, smoke, or the light of a flame. School-level fire alarm circuits often use a heat sensor such as an NTC thermistor, whose resistance falls as its temperature rises. That change in resistance changes a voltage in the circuit, and once the voltage crosses a set level, a transistor switches on a buzzer or LED. Building alarms add smoke detectors, because smoke often appears before the temperature rises much. The principle is the same in every case: a sensor turns a physical change into an electrical signal, and a switching circuit turns that signal into a warning. The detectors on the ceilings of malls, hospitals and offices work this way.
Make it yourself
Make a heat-sensing fire alarm circuit yourself
Build your own version from scratch, or use the steps to understand how the ready-made model is put together before you present it.
What you need 9
Step by step 8 steps
Measure the thermistor's resistance at room temperature, then hold it between your fingers; the reading should fall as it warms.
Connect the thermistor from positive to a sensor point, and the preset from the sensor point to negative.
Connect the sensor point through the 1 kΩ resistor to the transistor's base, and the emitter to negative.
Connect the buzzer and the LED (with its resistor) side by side between positive and the transistor's collector.
Switch on at room temperature and turn the preset until the buzzer just stops.
Warm the thermistor with your fingers, or have an adult hold the cup of hot water near it: the buzzer and LED come on, and go off again as it cools.
Fix the thermistor at the ceiling of the model room with its legs insulated, and hide the board under the base.
Add the fire triangle chart and a 'sense, decide, warn' flow diagram beside the model.
Read this first
Safety first
Go through these points before you build or switch anything on. Younger students should do this with an adult.
- Never test the alarm with a flame, burning paper or a candle; use warm water or a hair dryer on low, handled by an adult.
- Use only the 9 V battery. This is a demonstration, not a real fire alarm for your home.
- Keep hot water away from the circuit and battery.
- Soldering and hot glue need adult supervision.
Troubleshooting
If something does not work
The usual problems with this model and how to fix them. Open a problem to see the fix.
The buzzer rings at room temperature
The preset is set past the trigger point. Turn it back until the buzzer stops, then a little further.
The alarm never rings, even when the sensor is warm
Check that you used an NTC thermistor (not a PTC), that the thermistor is on the positive side and the preset on the negative side, and that the transistor's pins are correct.
It keeps ringing for a while after the heat is taken away
The thermistor cools slowly, which is normal. Fanning it or using a smaller thermistor makes it reset faster.
The LED lights but the buzzer is silent
The buzzer may be a passive type, which needs a changing signal, or it may be connected backwards. Use an active buzzer and match its + mark to positive.
Exhibition day
How to present it
A running order for the exhibition table or the practical, step by step.
Draw the fire triangle and explain which sign of fire your alarm detects.
Trigger the sensor safely, with warm air from a hair dryer or a torch depending on what it senses, and never with an open flame at the stall.
Show a block diagram with three boxes: sensor, switching circuit and buzzer.
Explain why a building needs alarms in every room and not just one.
Practice
Viva questions
Practice questions on this model, with short answers. Try each one aloud before you open the answer.
What is the fire triangle?
It is the three things a fire needs to burn: fuel, oxygen and heat. Removing any one of them puts the fire out.
Name three signs of fire that an alarm can detect.
A rise in temperature, smoke, and the light given out by flames.
What does the transistor do in an alarm circuit?
It acts as a switch that turns on the buzzer when the sensor's signal crosses the set level.
Why do buildings use smoke detectors as well as heat detectors?
Smoke is often produced before the temperature rises much, so a smoke detector can give an earlier warning.
Project file
Project file outline
The headings of the project file, in order. Give each heading its own section and write it in your own words.
Free ebook: Writing a Science Project FileContents
- Aim: to make a fire alarm that warns when the temperature rises
- Introduction: the fire triangle and why early warning saves lives
- Materials and circuit diagram of the thermistor alarm
- Working of an NTC thermistor and a transistor switch
- Sense, decide, warn: the blocks of every alarm system
- Procedure and setting of the trigger point
- Observations: thermistor resistance at room temperature and when warmed, and alarm response (table)
- Heat detectors and smoke detectors compared, and fire safety at school
- Conclusion: what the model shows about early warning, and bibliography
Buying checklist
Before you buy
What to check before you order the model, and what to do when it arrives.
1Before you order
- Check the class and theme; it suits electricity, sensors and safety topics.
- Read the listing to see whether a battery and a report are included.
- Practise explaining the 'sense, decide, warn' steps before the exhibition.
- Keep it in its box to protect the sensor's thin legs.
- Check the delivery date for your PIN code on the marketplace, and order well before the exhibition or practical.
2When it arrives
- On arrival, have an adult hold warm water near the sensor to test it; never use a flame.
Next steps
Take it further
Ways to turn this model into a bigger investigation or a stronger exhibition entry.
Measure the thermistor's resistance in water at several temperatures, read with a thermometer, and plot a graph.
Add a 555 timer so the LED flashes for a stronger visual warning.
Compare a heat sensor with a smoke sensor module and explain why buildings mostly use smoke detectors.
Audience
Who it suits
Suits Class 7 to 10 science exhibitions on safety and electronics, and works as a demonstration board for school labs.
- ClassClass 1 to 9
- SubjectPhysics
Free to read
Free ebooks for this topic
Free PDF ebooks from Gurukul Technicals Institute on the science, the making and the presenting of projects like this one.
- Free PDF ebook
Electricity and Magnetism Experiments
Hands-on experiments with cells, wires, bulbs and magnets
- Free PDF ebook
Physics Working Models Explained
Twenty classic models, how each works and how to make it
- Free PDF ebook
Your Science Exhibition Guide
Choose a project, build it, present it and answer the judges with confidence
- Free PDF ebook
Writing a Science Project File
How to write the report, from the cover page to the bibliography