 61% off
- Physics
- Ready-made model
- Class 10 to 12
- Printed report included
Capacitor Condenser Charging & Discharging Science Class 12 Physics Investigatory Project Model
Code B0HLY3TPK9
- Paid for and delivered by Amazon or Flipkart. The current price and the delivery date for your PIN code are shown there.
- Sold by Gurukul Technicals Institute, Delhi.
- Need a different topic, a custom version or a school order? Ask on WhatsApp.
In this project guide
Ready-made model
About this model
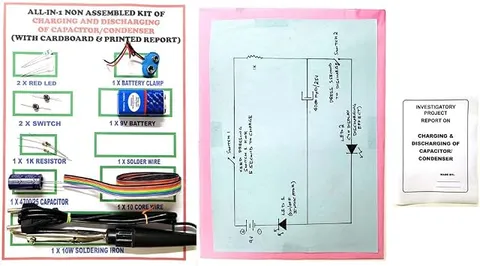
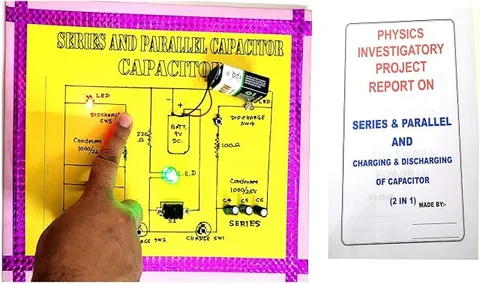
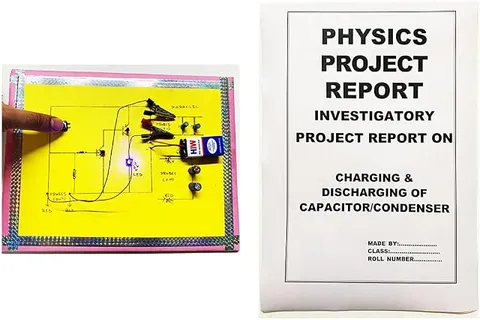
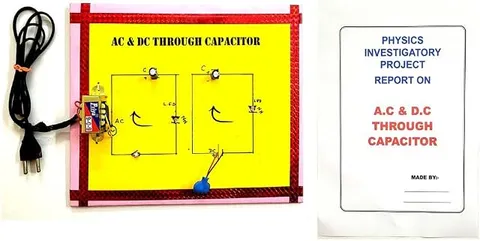
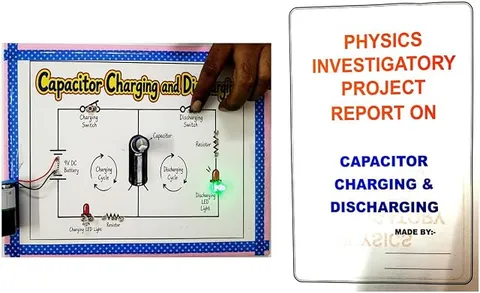
This Class 12 physics investigatory model shows a capacitor charging from a battery and then discharging through an LED. As shown in the photos, a white chart on a pink board framed in blue star-print tape has a circuit drawing with a 9 V battery, a charging switch, a charging LED and resistor, a large electrolytic capacitor in the middle, and a discharging switch with a resistor and a second LED, which glows green in the photos. The listing says a printed report with a cover comes with it.
How it works
The science behind it
The idea the model demonstrates, in words you can use in your report and when you explain it.
A capacitor is two conductors separated by an insulator, and it stores charge: Q = CV, where C is its capacitance in farads. When the charging switch is pressed, the battery pushes charge onto the plates through the resistor. The current is largest at first and falls as the capacitor's voltage rises towards the battery voltage, so an LED in the charging path glows and then fades. The voltage rises as V = V0(1 − e^(−t/RC)), where RC is the time constant τ. After one time constant the capacitor reaches about 63% of V0, and after about five it is practically full. When the discharging switch is pressed, the stored charge flows out through the second resistor and LED, so that LED glows and then dims as the voltage falls as V = V0 e^(−t/RC). The energy stored is ½CV². Electrolytic capacitors have a marked negative lead and must be connected the right way round. A camera flash charges a capacitor slowly and empties it in an instant.
Make it yourself
Make a capacitor charging and discharging board yourself
Build your own version from scratch, or use the steps to understand how the ready-made model is put together before you present it.
What you need 10
Step by step 8 steps
Cover the base with the pink sheet, glue the white chart on top, frame it with tape and write the title.
- Draw the circuit
The battery on the left, the capacitor in the middle, the charging loop with its switch, LED and resistor on the left, and the discharging loop with its switch, resistor and LED on the right. Add curved arrows for the charging and discharging cycles.
Fix the capacitor in the middle and note which lead is marked with the negative stripe.
- Wire the charging loop
Battery positive to the charging switch, the switch to a 1 kΩ resistor, the resistor to the red LED's long leg, its short leg to the capacitor's positive lead, and the capacitor's negative lead to battery negative.
- Wire the discharging loop
Capacitor positive to the discharging switch, the switch to the other 1 kΩ resistor, the resistor to the green LED's long leg, and its short leg to the capacitor's negative lead.
Hold the charging switch for a few seconds: the red LED glows and then fades. Release it and press the discharging switch: the green LED glows and then fades.
Connect the multimeter across the capacitor and watch the voltage rise while charging and fall while discharging, timing each with the stopwatch.
Label every part on the chart, and cover the back wiring with a sheet of card.
Read this first
Safety first
Go through these points before you build or switch anything on. Younger students should do this with an adult.
- Fit the electrolytic capacitor the right way round and use one rated above 9 V; reversed or over-voltage, it can swell or burst.
- Keep a resistor in each loop, and never join the capacitor's two leads directly, because a sudden discharge can spark and damage it.
- Never short the battery terminals, and remove the battery when the model is not in use.
- Solder only with an adult and keep the hot iron on its stand.
Troubleshooting
If something does not work
The usual problems with this model and how to fix them. Open a problem to see the fix.
The charging LED does not light
The capacitor may already be full, so press the discharging switch first. Also check that the LED's long leg faces the battery side and that the battery is fresh.
The discharging LED does not light
Charge the capacitor first, then press the discharging switch. If it still stays dark, the LED is probably in backwards.
The glow lasts only a moment
The time constant RC is small. Use a larger capacitor for a longer glow; a larger resistor also slows it but makes the LED dimmer.
The meter shows some voltage left after the LED goes out
An LED stops conducting once the voltage across it falls below what it needs to glow, so a little charge stays behind. This is normal; it drains slowly through the meter.
Exhibition day
How to present it
A running order for the exhibition table or the practical, step by step.
Press the charging switch and point out that the charging LED glows only while charge is flowing into the capacitor.
Then press the discharging switch and show the second LED glowing and fading as the stored charge flows out.
Charge for a moment and then for longer, and show that a fuller capacitor gives a longer glow on discharge.
Write Q = CV and τ = RC on a card, and read the capacitance and voltage printed on the capacitor's body.
Practice
Viva questions
Practice questions on this model, with short answers. Try each one aloud before you open the answer.
What is capacitance?
It is the charge stored per unit potential difference, C = Q/V, and its SI unit is the farad.
What is the time constant of an RC circuit?
It is τ = RC, the time in which a charging capacitor reaches about 63% of the supply voltage.
Why does the charging LED fade even though the switch is still pressed?
As the capacitor charges, its voltage opposes the battery's, so the current falls towards zero.
Why must an electrolytic capacitor be connected the right way round?
Reverse voltage damages its thin insulating oxide layer, so it can heat up, leak or even burst.
Project file
Project file outline
The headings of the project file, in order. Give each heading its own section and write it in your own words.
The listing includes a printed project report: use this outline to check that your own file covers every part.
Free ebook: Writing a Science Project FileContents
- Aim: to study the charging and discharging of a capacitor through a resistor
- Introduction: capacitors, capacitance and the farad
- Charging and discharging through a resistor, with the equations
- The time constant RC and its meaning
- Circuit diagram and construction of the board
- Observations: LED glow and capacitor voltage against time
- Graphs of the charging and discharging curves
- Applications: camera flash, timer circuits and smoothing in power supplies
- Precautions, sources of error and conclusion
Buying checklist
Before you buy
What to check before you order the model, and what to do when it arrives.
1Before you order
- Check that your teacher accepts this topic; capacitors are part of the Class 12 electrostatics chapter.
- The listing says one project and one printed report with a cover are in the box; read the report and add your own observations.
- The listing names a 9 V battery for this model, so keep a fresh spare for the exhibition day.
- The listing gives the size as about 33 cm by 23 cm, so plan a bag or folder that carries it flat.
- Check the delivery date for your PIN code on the marketplace, and order well before the exhibition or practical.
- Practise explaining it. Judges ask what the model shows and why; knowing the science matters as much as the model. The viva questions above are a good place to start.
2When it arrives
- Press both switches as soon as the model arrives to check that both LEDs light.
Next steps
Take it further
Ways to turn this model into a bigger investigation or a stronger exhibition entry.
In a separate test circuit with a 47 kΩ resistor, read the capacitor voltage every 5 seconds and plot the charging and discharging curves.
Join a second capacitor of the same value in parallel and show that the discharge glow lasts longer, because capacitances add in parallel.
Calculate the energy stored in the capacitor at full charge using ½CV², from the value printed on it and the battery voltage.
Audience
Who it suits
Suits Class 12 physics investigatory projects on capacitors and RC circuits, and science exhibitions on how electrical energy is stored.
- ClassClass 10 to 12
- SubjectPhysics
- TypeReady-made model
- Project reportPrinted report included
Free to read
Free ebooks for this topic
Free PDF ebooks from Gurukul Technicals Institute on the science, the making and the presenting of projects like this one.
- Free PDF ebook
Physics Working Models Explained
Twenty classic models, how each works and how to make it
- Free PDF ebook
Investigatory Projects for Class 11 and 12
Topics, method and report structure for physics, chemistry and biology
- Free PDF ebook
Your Science Exhibition Guide
Choose a project, build it, present it and answer the judges with confidence
- Free PDF ebook
Writing a Science Project File
How to write the report, from the cover page to the bibliography