- Components and Spares
- Component
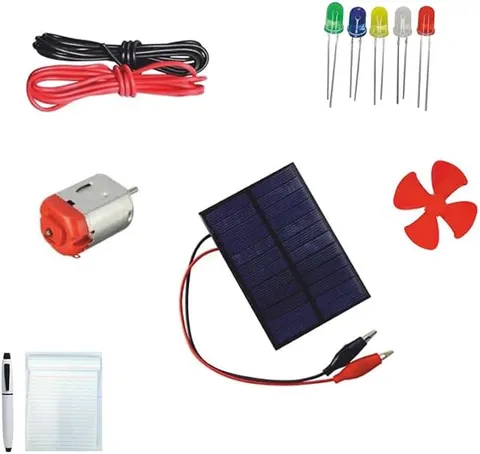
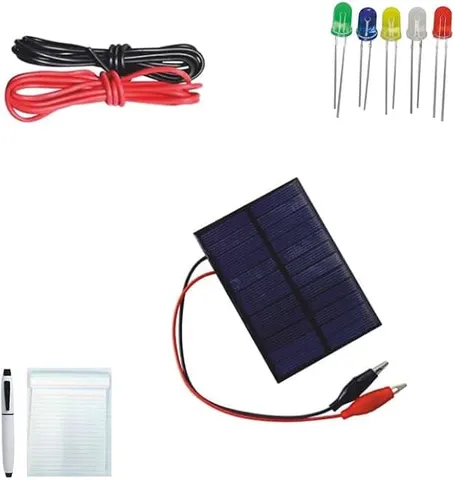
6V2W Solar Panel Kit DIY with Wires,LEDs,Red-Black Wires
Code B0FGV3PTL8
- Paid for and delivered by Amazon. The current price and the delivery date for your PIN code are shown there.
- Sold by Gurukul Technicals Institute, Delhi.
- Need a different topic, a custom version or a school order? Ask on WhatsApp.
Component
About this part
A 6V, 2W solar panel kit that, as the listing says, has connecting wires and LEDs, so students can power small loads straight from sunlight. It is a good way to learn how a panel's ratings, current and power are related.
What the listing says
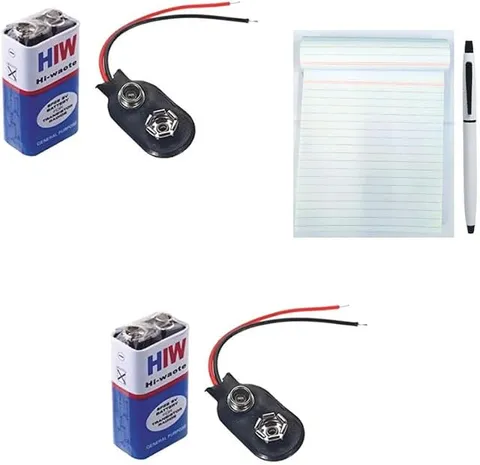
- Free Pad & Pen
How it works
The science behind it
The idea the part demonstrates, in words you can use in your report and when you explain it.
A solar panel's rating tells you what it can deliver in strong sunlight. Power is voltage times current, P = VI, so a 6 V, 2 W panel gives about I = P/V = 2/6 ≈ 0.33 A, or 333 mA, at its rated output. Panels are rated under standard bright light, so on a hazy afternoon the real output is lower. The red wire conventionally marks positive and the black wire negative. A red LED needs only about 2 V and around 20 mA, so connecting it straight to 6 V would push too much current and burn it out. A series resistor limits the current: R = (V supply − V LED) ÷ I = (6 − 2) ÷ 0.02 = 200 Ω, so the next standard value, 220 Ω, is a safe choice. Solar lanterns and garden lights work this way, usually with a rechargeable battery to store energy for the night.
Using it in your projects
Using a 6 V 2 W solar panel in your projects
What this part is good for, what else you need with it and how to connect it.
Projects you can build with it 7
- An automatic solar garden light
- A solar LED name board or festival light
- A solar charging station model for rechargeable cells
- A demonstration of choosing LED resistors for different colours
- A solar water pump for a drip irrigation model
- An experiment recording the panel's output every hour through a sunny day
- A solar street light model for a smart city project
What else you need 9
How to connect it 8 steps
In full sun, measure the panel's voltage with nothing connected, then its short-circuit current on the meter's current range, and compare the current with the rated value of about 0.33 A (2 W ÷ 6 V).
Work out the resistor each LED needs: R = (6 − V_LED) ÷ 0.02 A gives about 220 Ω for a red LED (2 V) and 150 Ω for a white LED (3 V). Connect one LED with its resistor and check it lights in sunlight.
Add more LEDs in parallel, each with its own resistor, and note how many the panel can run before they begin to dim.
To store energy, connect the panel's positive lead through the Schottky diode, band towards the cells, to the positive end of the four NiMH cells, and the panel's negative lead to the cells' negative end.
Build the night switch on the breadboard: 22 kΩ from the cells' positive to the transistor's base, the LDR from the base to negative, the emitter to negative, and a white LED with the 100 Ω resistor from the cells' positive to the collector.
- Cover the LDR
The LED switches on. Uncover it: the LED goes off.
Leave the panel charging the cells in the sun for a day, then test the light after dark.
Fit everything in the clear box, with the LDR facing the sky but shaded from the LED's own light.
Read this first
Safety first
Go through these points before you build or switch anything on. Younger students should do this with an adult.
- Never look at the sun while aiming the panel.
- Charge only NiMH rechargeable cells; never try to charge ordinary alkaline or zinc cells, which can leak or burst.
- Never connect an LED to the panel without its resistor; in full sun, 6 V will burn it out at once.
- Do not connect the panel directly to a phone or a lithium battery, because its output is not regulated.
- The panel gets hot in strong sun, so handle it by the edges.
Troubleshooting
If something does not work
The usual problems with this part and how to fix them. Open a problem to see the fix.
An LED burnt out the moment it went into the sun
It had no series resistor, or one that was far too small. Use about 220 Ω for red or green and 150 Ω for white.
The cells do not seem to charge
The diode may be reversed, the sky too cloudy, or the cells old. Measure the cells' voltage before and after a sunny day to check.
The night light switches on during the day
The LDR is shaded or the resistor value does not suit your LDR. Put the LDR where it sees the sky, or replace the 22 kΩ with a preset and adjust it.
The light stays on only a short time at night
The cells did not get enough charge. Tilt the panel to face the sun, give it more hours of sunlight, or run fewer LEDs.
Exhibition day
How to present it
A running order for the exhibition table or the practical, step by step.
Show the current calculation from P = VI on a card and, with a multimeter, compare it with a real reading in sunlight.
Put a resistor in series with each LED and explain the calculation that picks its value.
Point out the red and black wires and explain why polarity matters for LEDs.
Record the output at different times of day and plot a simple graph for your project file.
Practice
Viva questions
Practice questions on this part, with short answers. Try each one aloud before you open the answer.
What current does a 6 V, 2 W panel give at its rated output?
About 0.33 A, because I = P/V = 2/6.
Why is a resistor needed in series with an LED?
An LED has very little resistance once it conducts, so without a resistor too much current flows and it burns out.
Why is the real output often lower than the rating?
The rating is measured under strong standard light, while real sunlight is often weaker because of haze, clouds, angle and heat.
What energy conversion takes place in a solar panel?
Light energy from the Sun is converted directly into electrical energy.
Buying checklist
Before you buy
What to check before you order the part, and what to do when it arrives.
1Before you order
- Read the listing for the panel's size, wire length and the LEDs mentioned, so you know what else to arrange.
- Remember that 2 W is enough for LEDs and small motors but not for charging a phone or running a large fan.
- Store it flat with its face protected from scratches.
- Exhibitions are often indoors, so plan a way to show it working, such as cells charged beforehand.
- Check the delivery date for your PIN code on the marketplace, and order well before the exhibition or practical.
- Check what is in the box on the marketplace listing, including any batteries or tools you need to add.
- Building it yourself: younger students should build with an adult, especially with motors, batteries and small parts.
2When it arrives
- Test the panel in sunlight as soon as it arrives and check its face for cracks.
Next steps
Take it further
Ways to turn this part into a bigger investigation or a stronger exhibition entry.
Measure the open-circuit voltage and short-circuit current every hour through a day, plot them, and estimate the energy the panel collects in watt-hours.
Calculate how long the charged cells can run your LEDs by dividing the cells' capacity in mAh by the LED current in mA.
Compare the panel's voltage on a hot afternoon and a cool morning with the same sunlight, and explain why silicon panels give less voltage when hot.
Audience
Who it suits
Suits Class 7 to 12 solar energy projects and students practising calculations with power, voltage and current.
- CategoryComponents and Spares
- TypeComponent
Free to read
Free ebooks for this topic
Free PDF ebooks from Gurukul Technicals Institute on the science, the making and the presenting of projects like this one.
- Free PDF ebook
Electronic Components Handbook
Resistors, capacitors, LEDs, diodes, transistors and more, with how to use each
- Free PDF ebook
Electricity and Magnetism Experiments
Hands-on experiments with cells, wires, bulbs and magnets