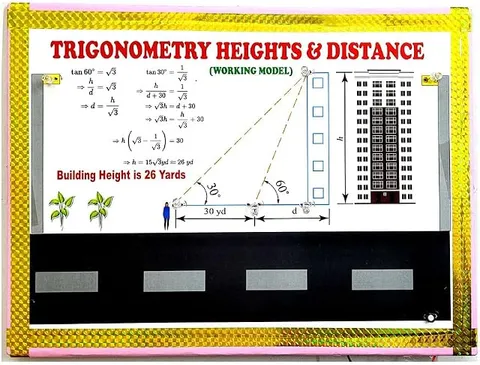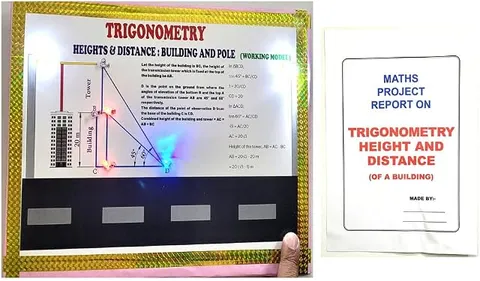
- Maths
- Ready-made model
- Printed report included
Trigonometry Readymade Maths Working Project & Model in Mathematics with Lights(with Printed Report)
Code B099R1D6NH
- Paid for and delivered by Amazon. The current price and the delivery date for your PIN code are shown there.
- Sold by Gurukul Technicals Institute, Delhi.
- Need a different topic, a custom version or a school order? Ask on WhatsApp.
In this project guide
Ready-made model
About this model
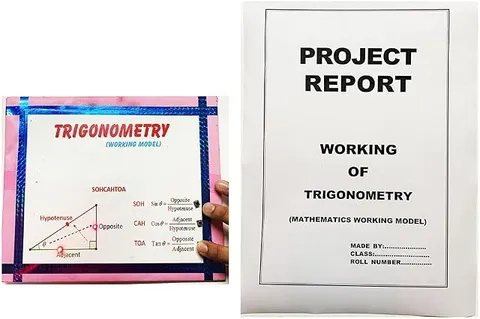
This readymade maths model is about trigonometric ratios and shows how sine, cosine and tangent come from the sides of a right-angled triangle. The listing says it comes with lights and a printed report.
How it works
The science behind it
The idea the model demonstrates, in words you can use in your report and when you explain it.
Trigonometry links the angles and sides of a right-angled triangle. For an acute angle θ, the side opposite it is the perpendicular, the side next to it is the base, and the longest side is the hypotenuse. The ratios are sin θ = perpendicular/hypotenuse, cos θ = base/hypotenuse and tan θ = perpendicular/base. Their reciprocals are cosec θ, sec θ and cot θ. Because the ratios depend only on the angle, not on the size of the triangle, one table of standard values works for every triangle: sin 30° = 1/2, sin 45° = 1/√2 and sin 60° = √3/2, while cos θ takes the same values in reverse order. The identity sin²θ + cos²θ = 1 comes straight from Pythagoras' theorem. A 5 m ladder whose foot is 3 m from a wall reaches 4 m up it, so for the angle it makes with the ground, cos θ = 3/5 and sin θ = 4/5.
Make it yourself
Make a trigonometric ratios model with lights yourself
Build your own version from scratch, or use the steps to understand how the ready-made model is put together before you present it.
What you need 9
Step by step 8 steps
Draw a quarter circle of radius 20 cm with its centre near a bottom corner of the board, and mark the angles every 15°, with 30°, 45° and 60° in bold.
Pivot the arm at the centre with the paper fastener so its tip runs along the arc. The arm stands for a hypotenuse of 20 cm.
Hang the weighted thread from the tip of the arm so it falls straight down to the base line; the thread is the perpendicular and the base line up to it is the base.
Mark the base line and the left edge in centimetres, so you can read the base and perpendicular for any angle. Then sin θ = perpendicular ÷ 20 and cos θ = base ÷ 20.
Stick a copper or foil pad on the arc at each standard angle. Wire each pad through its resistor to the long leg of its own LED, and join all the short legs to the battery negative.
Connect the bare contact under the arm's tip to the battery positive through the switch, so the LED for an angle lights when the arm reaches it.
Beside each LED, stick a card with sin, cos and tan for that angle, writing 'not defined' for tan 90°.
Turn the arm to each angle, read the base and perpendicular, and check them against the value cards.
Read this first
Safety first
Go through these points before you build or switch anything on. Younger students should do this with an adult.
- Use a cutter only with an adult, and cover the pivot's sharp end at the back.
- Keep a resistor with every LED.
- Switch off when not presenting so the battery does not run down.
- Check that no bare wire under the board can touch another and short the battery.
Troubleshooting
If something does not work
The usual problems with this model and how to fix them. Open a problem to see the fix.
An LED flickers or lights only if you press the arm down
The contact under the arm is not pressing firmly on the pad. Bend the bare wire into a gentle spring so it rubs on the pads, and smooth any lumps in the foil.
The measured sine values are slightly off
The arm may not be exactly 20 cm from the pivot centre to its tip, the pivot hole may be loose, or the thread may still be swinging. Re-measure the arm, tighten the pivot and let the thread settle.
Two LEDs light together
Two pads are touching or are too close. Trim the foil so there is a clear gap between neighbouring pads.
Visitors ask why tan 90° has no value
At 90° the base is zero, and you cannot divide by zero, so tan 90° is not defined. Turn the arm close to 90° to show the perpendicular growing while the base shrinks.
Exhibition day
How to present it
A running order for the exhibition table or the practical, step by step.
Draw a large right-angled triangle on a chart and label the perpendicular, base and hypotenuse for one chosen angle.
Recite the standard values for 0°, 30°, 45°, 60° and 90°, showing the sine pattern √0/2, √1/2, √2/2, √3/2, √4/2.
Prove sin²θ + cos²θ = 1 from Pythagoras' theorem in two or three lines.
Use the ladder leaning on a wall as a quick real-life example.
Practice
Viva questions
Practice questions on this model, with short answers. Try each one aloud before you open the answer.
What is sin²θ + cos²θ equal to?
It is always 1, for every angle θ; this follows from Pythagoras' theorem.
What is the value of tan 90°?
tan 90° is not defined, because cos 90° = 0 and we cannot divide by zero.
Do the trigonometric ratios change if the triangle is made bigger?
No. Similar triangles have the same angles, so the ratios of their sides stay the same.
How are tan θ, sin θ and cos θ related?
tan θ = sin θ / cos θ, whenever cos θ is not zero.
Project file
Project file outline
The headings of the project file, in order. Give each heading its own section and write it in your own words.
The listing includes a printed project report: use this outline to check that your own file covers every part.
Free ebook: Writing a Science Project FileContents
- Aim: to show the trigonometric ratios of an angle using a right-angled triangle model
- Introduction: perpendicular, base and hypotenuse
- The six trigonometric ratios and their reciprocals
- Values of the ratios at 0°, 30°, 45°, 60° and 90°
- Construction of the rotating-arm model and the LED angle indicator
- Observations: measured values compared with table values
- Verification of sin²θ + cos²θ = 1
- Applications of trigonometry
- Conclusion
Buying checklist
Before you buy
What to check before you order the model, and what to do when it arrives.
1Before you order
- Check that trigonometric ratios are in your class syllabus and that the model suits your teacher's brief.
- Read the listing to see what is mentioned with the model, such as the lights and printed report, and whether a battery is needed.
- Learn the standard values table well enough to explain it without reading, as that is the most common question.
- Keep the box to carry the model safely.
- Check the delivery date for your PIN code on the marketplace, and order well before the exhibition or practical.
- The project report is a learning aid. Read it, understand how the model works, and write your own observations; schools expect your own work.
2When it arrives
- Try the lights as soon as it arrives and again a few days before the exhibition.
Next steps
Take it further
Ways to turn this model into a bigger investigation or a stronger exhibition entry.
Extend the arm to a full circle and show the signs of the ratios in all four quadrants.
Record the perpendicular every 15° from 0° to 360° and plot it to draw a sine wave.
Show the complementary-angle results, such as sin(90° − θ) = cos θ, with the arm.
Add a heights-and-distances example to show trigonometry in use.
Audience
Who it suits
Suits Class 10 maths exhibitions and introduction-to-trigonometry lessons, and quick revision in Class 11.
- SubjectMaths
- TypeReady-made model
- Project reportPrinted report included
Free to read
Free ebooks for this topic
Free PDF ebooks from Gurukul Technicals Institute on the science, the making and the presenting of projects like this one.
- Free PDF ebook
Maths Working Models and Activities
Make maths visible: models for number, geometry, algebra and data
- Free PDF ebook
Your Science Exhibition Guide
Choose a project, build it, present it and answer the judges with confidence
- Free PDF ebook
Writing a Science Project File
How to write the report, from the cover page to the bibliography
- Free PDF ebook
Viva Questions for Science Projects
How to answer examiner questions, with sample questions for popular projects