- Physics
- Ready-made model
- Class 10 to 12
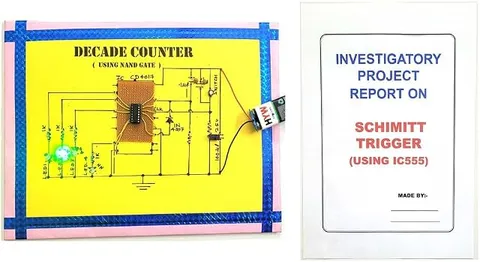
Ontex Electronics Schmitt Trigger Using IC555 Physics Investigatory Project Model Engineering College & Science Teaching Aid
Code B0DML1H6TD
- Paid for and delivered by Amazon. The current price and the delivery date for your PIN code are shown there.
- Sold by Gurukul Technicals Institute, Delhi.
- Need a different topic, a custom version or a school order? Ask on WhatsApp.
In this project guide
Ready-made model
About this model
This investigatory project model shows the 555 timer IC working as a Schmitt trigger, a circuit that turns a slowly changing or noisy signal into a clean on-off output. It introduces hysteresis, the idea that explains why good automatic switches do not flicker. It suits Class 12 projects and engineering electronics teaching.
How it works
The science behind it
The idea the model demonstrates, in words you can use in your report and when you explain it.
Inside the 555 are two comparators, referenced by a chain of three equal resistors to 2/3 and 1/3 of the supply voltage Vcc. For a Schmitt trigger, the trigger (pin 2) and threshold (pin 6) inputs are tied together and fed by the input signal. When the input rises above 2/3 Vcc the output switches LOW, and it stays LOW until the input falls below 1/3 Vcc, when it switches HIGH. With a 9 V supply the two switching points are 6 V and 3 V. This gap between the switch-on and switch-off levels is called hysteresis, and it stops a signal wobbling slightly around one level from making the output chatter. A sine wave at the input becomes a square wave at the output, and because a high input gives a low output, the circuit is an inverting Schmitt trigger. Automatic street lights use hysteresis so they do not flicker at dusk.
Make it yourself
Make a 555 Schmitt trigger yourself
Build your own version from scratch, or use the steps to understand how the ready-made model is put together before you present it.
What you need 9
Step by step 8 steps
Fit the 555 in its socket, connect pins 4 and 8 to the positive rail and pin 1 to the negative rail, and fit the 10 nF capacitor from pin 5 to negative.
Join pins 2 and 6 together; this joined point is the input of the Schmitt trigger.
Connect the potentiometer's outer legs to the two rails and its middle leg to the joined pins 2 and 6, so the knob moves the input smoothly from 0 V to the full supply.
Connect one LED with its resistor from pin 3 to negative, so it lights when the output is HIGH, and the other from positive to pin 3, so it lights when the output is LOW.
Switch on with the knob at 0 V, where the output is HIGH. Turn the knob up slowly while measuring the input, and note the voltage at which the output switches LOW.
Turn the knob down slowly and note the voltage at which it switches back HIGH; it is much lower than the first.
Repeat a few times, then draw output against input for rising and falling inputs; the two paths form the hysteresis loop.
Replace the potentiometer with an LDR and the 10 kΩ resistor as a divider, and show that the output switches cleanly as the light changes, without flickering.
Read this first
Safety first
Go through these points before you build or switch anything on. Younger students should do this with an adult.
- Use only the 9 V battery; do not connect the board to any mains-powered device.
- Check the IC's notch before switching on, and switch off at once if it gets warm.
- Give each LED its resistor; an LED on the output without one can burn out.
- Solder only with an adult.
Troubleshooting
If something does not work
The usual problems with this model and how to fix them. Open a problem to see the fix.
The output never changes
Check that pin 4 is connected to positive, because if it is left loose the IC can stay reset, and that pins 2 and 6 really are joined to the potentiometer's middle leg.
The switching points are not at 6 V and 3 V
They are always two-thirds and one-third of the actual supply. Measure the battery: a tired battery giving 8 V moves them to about 5.3 V and 2.7 V.
Both LEDs glow faintly
An LED is the wrong way round or on the wrong rail. Check that one runs from pin 3 to negative and the other from positive to pin 3.
The output flickers at the switching point
A worn potentiometer or long loose wires can add noise. Check the 10 nF capacitor on pin 5 and tighten the connections.
Exhibition day
How to present it
A running order for the exhibition table or the practical, step by step.
If your model has a variable input, change it slowly and show that the output switches at two different levels.
Plot input voltage against output on graph paper to draw the hysteresis loop.
Write the switching points for your supply voltage (2/3 Vcc and 1/3 Vcc) on the chart.
Use the street light example to explain why hysteresis prevents flickering at dusk.
Practice
Viva questions
Practice questions on this model, with short answers. Try each one aloud before you open the answer.
What is a Schmitt trigger?
A comparator circuit with two different switching thresholds, which converts a slowly varying or noisy input into a clean digital output.
What are the threshold voltages of a 555 Schmitt trigger?
The upper threshold is 2/3 Vcc and the lower threshold is 1/3 Vcc.
What is hysteresis?
The difference between the switch-on and switch-off input levels, which stops the output from switching repeatedly because of small fluctuations.
Which pins of the 555 are joined in a Schmitt trigger circuit?
Pin 2 (trigger) and pin 6 (threshold) are connected together and act as the input.
Project file
Project file outline
The headings of the project file, in order. Give each heading its own section and write it in your own words.
Free ebook: Writing a Science Project FileContents
- Aim: to use the 555 timer as a Schmitt trigger and measure its hysteresis
- Inside the 555: the three-resistor divider, two comparators and the flip-flop
- Why joining pins 2 and 6 makes a Schmitt trigger
- Circuit diagram and construction
- Observation table: rising and falling input voltages and the output state
- Graph of the hysteresis loop
- Why hysteresis stops flicker: street lights, thermostats and noisy signals
- Conclusion and precautions
Buying checklist
Before you buy
What to check before you order the model, and what to do when it arrives.
1Before you order
- Check whether your syllabus or teacher expects a Schmitt trigger project, as it is often taught at engineering level.
- Read the listing for what input the model uses and what supply it needs; do not assume a battery is included.
- Test it a few days before the exhibition and carry a spare battery.
- Keep the box and padding for transport.
- Check the delivery date for your PIN code on the marketplace, and order well before the exhibition or practical.
2When it arrives
- When it arrives, measure its two switching voltages yourself so you can quote your own readings in the viva.
Next steps
Take it further
Ways to turn this model into a bigger investigation or a stronger exhibition entry.
Feed a different voltage to pin 5 from a second potentiometer and show that the upper switching point moves to that voltage and the lower one to half of it.
Build the LDR light switch with and without the Schmitt trigger and show the flicker that hysteresis removes.
Remove the potentiometer, connect a resistor from pin 3 to the joined pins 2 and 6 and a capacitor from there to negative, and explain why the circuit now oscillates.
Audience
Who it suits
Class 12 physics investigatory projects, and engineering, diploma and ITI electronics labs on timers and digital circuits.
- ClassClass 10 to 12
- SubjectPhysics
- TypeReady-made model
Free to read
Free ebooks for this topic
Free PDF ebooks from Gurukul Technicals Institute on the science, the making and the presenting of projects like this one.
- Free PDF ebook
Physics Working Models Explained
Twenty classic models, how each works and how to make it
- Free PDF ebook
Investigatory Projects for Class 11 and 12
Topics, method and report structure for physics, chemistry and biology
- Free PDF ebook
Your Science Exhibition Guide
Choose a project, build it, present it and answer the judges with confidence
- Free PDF ebook
Writing a Science Project File
How to write the report, from the cover page to the bibliography