- Physics
- Ready-made model
- Class 1 to 9
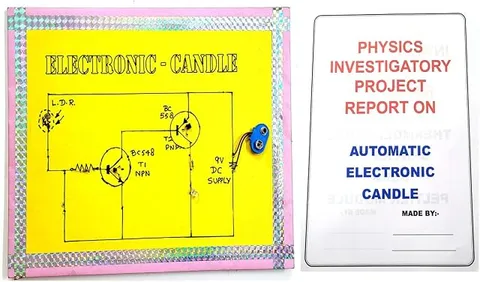
Automatic Electronic Candle
Code B0G2T81289
- Paid for and delivered by Amazon. The current price and the delivery date for your PIN code are shown there.
- Sold by Gurukul Technicals Institute, Delhi.
- Need a different topic, a custom version or a school order? Ask on WhatsApp.
In this project guide
Ready-made model
About this model
This working model is an electronic candle that responds to light through a light dependent resistor (LDR). It shows how a simple sensor can make a lamp switch itself on or off according to the light around it, which is the idea behind smart lighting. It is a safe way to show automation without a real flame.
What the listing says
- Smart Light Automation Light Dependent Resistance Based Working Model
How it works
The science behind it
The idea the model demonstrates, in words you can use in your report and when you explain it.
An LDR, or photoresistor, is usually made of cadmium sulphide, a semiconductor. In darkness it has very few free charge carriers, so its resistance is high, often around a mega-ohm. When light falls on it, photons give electrons enough energy to break free and conduct, so the resistance drops sharply to a few kilo-ohms or less. This is called photoconductivity. In a typical lamp circuit the LDR is placed in a voltage divider with a fixed resistor. As the light level changes, the voltage at their junction changes, and that voltage drives a transistor that switches the LED on or off. Nobody has to press a switch; the circuit decides from the light it senses. Your mobile phone does something similar when it dims its screen in a dark room, though it uses a different kind of light sensor.
Make it yourself
Make an automatic LDR electronic candle yourself
Build your own version from scratch, or use the steps to understand how the ready-made model is put together before you present it.
What you need 9
Step by step 9 steps
Test the LDR with a multimeter on the resistance range: note the reading in room light and again when you cover it with your finger. The reading should rise a lot in the dark.
On the breadboard, connect the 10 kΩ resistor and the 100 kΩ preset in series from battery positive to a point we will call the sensor point. Connect the LDR from the sensor point to battery negative.
Connect the sensor point to the base of the transistor (the middle leg on most BC547s, but check its pin diagram), the emitter to negative and the collector to the LED's short leg.
Connect the LED's long leg through the 470 Ω resistor to positive, and put the slide switch in the positive battery wire.
Switch on in a bright room and cover the LDR with your hand: the LED should light. Turn the preset slowly until the LED stays off in room light but comes on when the LDR is shaded.
When it works, hide the breadboard in the stand, or move the circuit onto the zero PCB (soldering only with an adult).
Make the candle body from the tube, paint it white and fix it on the stand. Bring the LED up through the top like a flame and wrap a little tracing paper around it.
Fix the LDR on the side of the candle facing the room, where room light reaches it but the LED's own glow does not.
Label the parts and place a card with the circuit diagram beside the model.
Read this first
Safety first
Go through these points before you build or switch anything on. Younger students should do this with an adult.
- Use only the 9 V battery; never connect the circuit to a charger's insides or to mains power.
- Soldering and cutting the cardboard tube need adult supervision; keep the soldering iron in its stand.
- Never put a real flame near the paper candle; the whole point of the model is a flameless candle.
- Disconnect the battery when the model is not in use, and never let its two terminals touch each other.
Troubleshooting
If something does not work
The usual problems with this model and how to fix them. Open a problem to see the fix.
The LED never lights, even in the dark
Check the LED is the right way round (long leg towards positive through the resistor) and that the transistor's legs match its pin diagram. Then turn the preset fully the other way, since the base may not be getting enough voltage.
The LED stays on even in bright light
Turn the preset until the LED goes off in room light. If that does not work, check that the LDR is between the sensor point and negative; if it is on the positive side the action is reversed.
The candle blinks on and off by itself
The LED's own light is reaching the LDR, switching it off, and the darkness then switches it back on. Shield the LDR with a small black paper tube or turn it away from the flame.
It worked at home but not at the exhibition
The hall may be brighter or darker than your room, which moves the switching point. Carry a small screwdriver and readjust the preset in the hall.
Exhibition day
How to present it
A running order for the exhibition table or the practical, step by step.
Cover the LDR with your palm to show the candle reacting, then uncover it, so the cause and effect is obvious.
Shine a phone torch on the LDR to show how strong light changes the response.
Draw a simple graph on a chart showing the LDR's resistance falling as the light gets brighter.
Compare it with a real candle: no flame, no smoke, no wax, and it reacts on its own.
Practice
Viva questions
Practice questions on this model, with short answers. Try each one aloud before you open the answer.
What is an LDR?
A light dependent resistor is a resistor whose resistance decreases as the intensity of light falling on it increases.
Which material is commonly used to make an LDR?
Cadmium sulphide (CdS), a semiconductor that conducts better when light falls on it.
Why does the resistance of an LDR fall in light?
Light energy frees electrons in the semiconductor, so more charge carriers are available to carry current. This is called photoconductivity.
What is the role of a transistor in an LDR circuit?
It works as a switch: the small voltage from the LDR divider controls its base, which turns a larger current through the LED on or off.
Project file
Project file outline
The headings of the project file, in order. Give each heading its own section and write it in your own words.
Free ebook: Writing a Science Project FileContents
- Aim: to make an electronic candle that lights itself when it gets dark, using an LDR
- Introduction: what automation means and where light sensors are used around us
- Materials used, with the value of each resistor
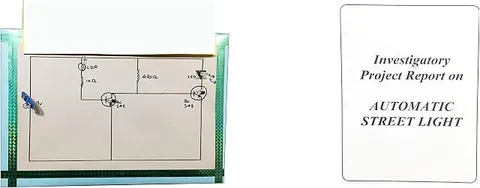
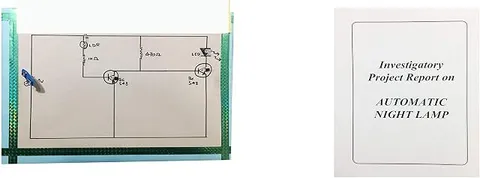
- Circuit diagram showing the LDR and resistor as a voltage divider
- Principle: photoconductivity in the LDR and the transistor as a switch
- Procedure: building the candle and setting the preset
- Observations: LDR resistance in bright light, room light and darkness (table)
- Advantages over a real candle, and limitations of the model
- Conclusion and bibliography
Buying checklist
Before you buy
What to check before you order the model, and what to do when it arrives.
1Before you order
- Check your class and chapter (light, electricity or sensors) so the model fits what your teacher asked for.
- Read the listing to see whether a battery and a printed report are included; keep a fresh 9 V battery ready if not.
- Look for the small adjuster (preset) on the board, if there is one, so you can set it for the hall lighting.
- Keep the box and some padding to carry the candle to school without bending the LED.
- Check the delivery date for your PIN code on the marketplace, and order well before the exhibition or practical.
- Practise explaining it. Judges ask what the model shows and why; knowing the science matters as much as the model. The viva questions above are a good place to start.
2When it arrives
- Test it in a dark room and in bright light as soon as it arrives, and again a few days before the exhibition.
Next steps
Take it further
Ways to turn this model into a bigger investigation or a stronger exhibition entry.
Measure the LDR's resistance with a torch at different distances and plot resistance against distance.
Add a relay so the same sensor switches a bigger low-voltage lamp, and explain how street lights use the idea.
Make a row of candles that light one after another as the room gets darker by giving each a different preset setting.
Audience
Who it suits
Good for Class 8 to 10 science exhibitions and as a first sensor project for students starting electronics.
- ClassClass 1 to 9
- SubjectPhysics
- TypeReady-made model
Free to read
Free ebooks for this topic
Free PDF ebooks from Gurukul Technicals Institute on the science, the making and the presenting of projects like this one.
- Free PDF ebook
Electricity and Magnetism Experiments
Hands-on experiments with cells, wires, bulbs and magnets
- Free PDF ebook
Physics Working Models Explained
Twenty classic models, how each works and how to make it
- Free PDF ebook
Your Science Exhibition Guide
Choose a project, build it, present it and answer the judges with confidence
- Free PDF ebook
Writing a Science Project File
How to write the report, from the cover page to the bibliography