- Physics
- Ready-made model
- Class 10 to 12
Microphone Amplifier Assembled Kit Using IC Physics Investigatory Minor Project and Model
Code B0C3H7BD64
- Paid for and delivered by Amazon. The current price and the delivery date for your PIN code are shown there.
- Sold by Gurukul Technicals Institute, Delhi.
- Need a different topic, a custom version or a school order? Ask on WhatsApp.
In this project guide
Ready-made model
About this model
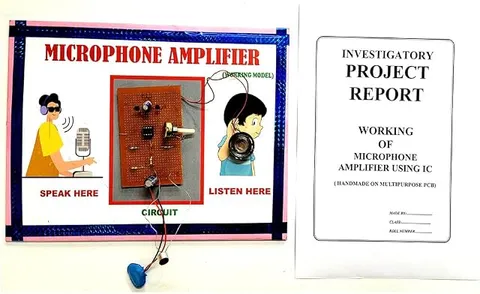
This assembled microphone amplifier uses an amplifier IC to make the weak signal from a microphone strong enough to be heard through a speaker. It demonstrates how sound is turned into an electrical signal, made bigger and turned back into sound, as in a public address system.
How it works
The science behind it
The idea the model demonstrates, in words you can use in your report and when you explain it.
A microphone converts sound waves into an electrical signal whose voltage varies in step with the sound. This signal is very weak, often only a few millivolts, which is far too small to move a speaker cone. An amplifier increases its amplitude while keeping its shape, so the speaker reproduces the same sound, only louder. Voltage gain is the ratio of output voltage to input voltage, Av = Vout / Vin; a gain of 100 turns a 5 mV signal into 0.5 V. Gain is often expressed in decibels as 20 log₁₀(Av), so a gain of 100 is 40 dB. The amplifier does not create the extra energy; it takes it from the power supply. If the microphone is held too close to the speaker, the amplified sound re-enters the microphone and is amplified again and again, causing a loud howl called acoustic feedback. The mic and loudspeakers at a school assembly or a wedding use this same chain.
Make it yourself
Make a microphone amplifier with an IC yourself
Build your own version from scratch, or use the steps to understand how the ready-made model is put together before you present it.
What you need 11
Step by step 8 steps
Solder the 8-pin socket onto the board and mark which end has the notch. Do not put the IC in until all the soldering is finished.
- Wire the supply
Pin 6 to the positive line through the switch, pins 2 and 4 to the negative line, the 100 µF capacitor across the supply close to the socket (long leg to positive), and one 10 µF capacitor from pin 7 to negative.
- Power the microphone
The lead joined to its metal case goes to negative, and the other lead goes to positive through the 4.7 kΩ resistor.
Take the signal from the microphone's positive lead through the 0.1 µF capacitor to one end of the potentiometer. Join the other end to negative and the middle pin to pin 3 of the IC.
Connect pin 5 to the long leg of the 220 µF capacitor, its short leg to one speaker terminal, and the other speaker terminal to negative.
Before fitting the IC, switch on and check with the multimeter that the socket's pin 6 reads about 9 V. Switch off, then press the LM386 in with its notch matching your mark.
Turn the volume right down, switch on and speak into the microphone with the speaker about a metre away and facing away from it. Raise the volume slowly.
Play a steady tone from one phone near the microphone and read the sound level beside the speaker with the other phone. Then add the second 10 µF capacitor between pins 1 and 8 (long leg to pin 1) and read again: the IC's gain rises from about 20 to about 200.
Read this first
Safety first
Go through these points before you build or switch anything on. Younger students should do this with an adult.
- Use the soldering iron only with an adult, rest it in its stand, and never touch the tip or fresh joints.
- Keep the speaker away from your ear when you switch on or turn the volume up; a feedback howl can be painfully loud.
- Fit the IC and the electrolytic capacitors the right way round; a reversed IC gets hot within seconds and a reversed capacitor can burst.
- Run the amplifier from the 9 V battery only, and disconnect it before changing any part.
Troubleshooting
If something does not work
The usual problems with this model and how to fix them. Open a problem to see the fix.
The speaker gives a loud whistle or howl
This is acoustic feedback: the microphone is picking up the speaker's own sound and amplifying it again. Turn the volume down, point the microphone away from the speaker and move them further apart, or remove the gain capacitor between pins 1 and 8.
There is no sound at all
Check that the IC's notch matches the socket, that the microphone's case lead goes to negative, that the 220 µF capacitor is in place, and that the battery is good. With no sound coming in, pin 5 should read about half the supply, around 4.5 V; a reading of 0 V or 9 V points to the IC or its wiring.
The sound is crackly or distorted
The battery may be weak and sagging on loud sounds, the volume may be too high, or a joint may be loose. Fit a fresh battery, make sure the 100 µF capacitor is across the supply, and reflow any dull-looking joints.
There is a steady hum or buzz
A long wire from the microphone to pin 3 picks up hum like an aerial. Keep that wire short or twist it with its return wire, and keep the board away from phone chargers and other mains adapters.
Exhibition day
How to present it
A running order for the exhibition table or the practical, step by step.
Speak softly into the microphone and let the audience hear the amplified voice.
Keep the microphone away from the speaker to avoid a feedback howl, and explain why it happens.
Draw a block diagram: microphone, amplifier, speaker and power supply.
Work out one gain example on a chart, such as 5 mV in and 0.5 V out.
Practice
Viva questions
Practice questions on this model, with short answers. Try each one aloud before you open the answer.
What does an amplifier do?
It increases the amplitude of a signal without changing its shape, using energy from the power supply.
What is voltage gain?
The ratio of output voltage to input voltage, Av = Vout / Vin.
What causes the howling sound in a microphone system?
Acoustic feedback: sound from the speaker re-enters the microphone and is amplified again and again.
What energy change happens in a microphone?
Sound energy is converted into electrical energy.
Project file
Project file outline
The headings of the project file, in order. Give each heading its own section and write it in your own words.
Free ebook: Writing a Science Project FileContents
- Aim: to amplify the weak signal from a microphone with an IC so that it can drive a speaker
- Introduction: sound waves, and microphones and speakers as transducers
- Theory: voltage gain Av = Vout / Vin and gain in decibels, 20 log₁₀(Av)
- Circuit diagram of the LM386 amplifier and the job of each part
- Construction and testing steps
- Observations: sound level readings with a gain of about 20 and about 200
- Where the extra energy comes from: the battery, not the microphone
- Applications: public address systems, intercoms and hearing aids
- Precautions, conclusion and bibliography
Buying checklist
Before you buy
What to check before you order the model, and what to do when it arrives.
1Before you order
- Check that an amplifier or transducer project fits your class syllabus and that your teacher accepts a ready-assembled circuit.
- Read the listing to see which IC it uses, what powers it and whether a microphone and speaker are part of the item, so you know what else to arrange.
- Practise explaining the path of the signal from microphone to IC to speaker, as examiners often ask where the extra energy comes from.
- Keep the box and padding so the speaker and leads are not bent on the way to school.
- Check the delivery date for your PIN code on the marketplace, and order well before the exhibition or practical.
2When it arrives
- Test it with the volume low as soon as it arrives, and again with a fresh battery a few days before the exhibition.
Next steps
Take it further
Ways to turn this model into a bigger investigation or a stronger exhibition entry.
Play tones of different frequencies from the app and plot a rough frequency response of the amplifier.
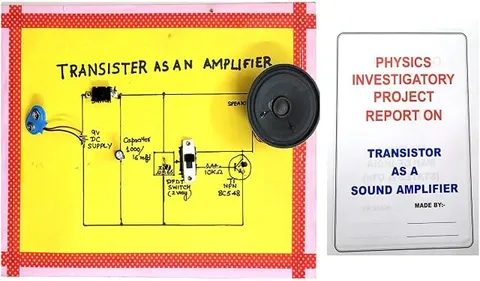
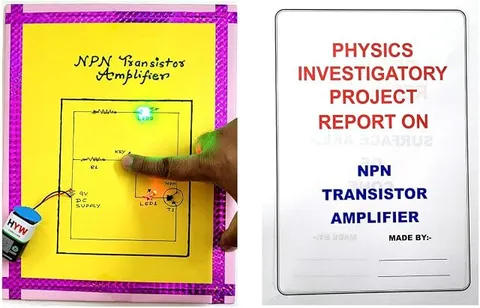
Build the same stage with a single transistor and compare its loudness and distortion with the IC version.
Add a simple tone control with a capacitor and a potentiometer, and explain how it cuts the high frequencies.
Measure the battery current at low and high volume and relate it to the power delivered to the speaker.
Audience
Who it suits
Class 9 to 12 students and electronics hobbyists interested in sound, audio and amplifier circuits.
- ClassClass 10 to 12
- SubjectPhysics
- TypeReady-made model
Free to read
Free ebooks for this topic
Free PDF ebooks from Gurukul Technicals Institute on the science, the making and the presenting of projects like this one.
- Free PDF ebook
Physics Working Models Explained
Twenty classic models, how each works and how to make it
- Free PDF ebook
Investigatory Projects for Class 11 and 12
Topics, method and report structure for physics, chemistry and biology
- Free PDF ebook
Your Science Exhibition Guide
Choose a project, build it, present it and answer the judges with confidence