- Physics
- Ready-made model
- Class 10 to 12
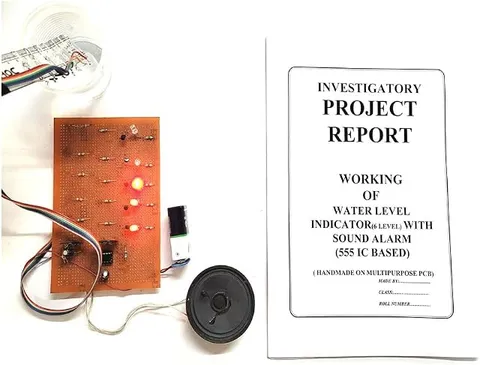
Water Level Indicator 6 With Sound Alarm On Multipurpose Handmade Physics Investigatory Major Project And Model-15 Months Up For Baby
Code B0C3H41NPB
- Paid for and delivered by Amazon. The current price and the delivery date for your PIN code are shown there.
- Sold by Gurukul Technicals Institute, Delhi.
- Need a different topic, a custom version or a school order? Ask on WhatsApp.
In this project guide
Ready-made model
About this model
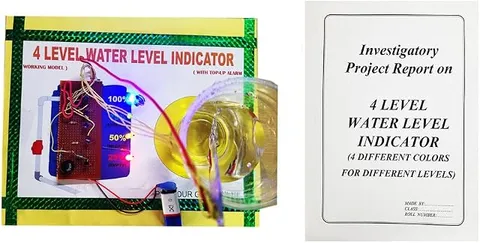
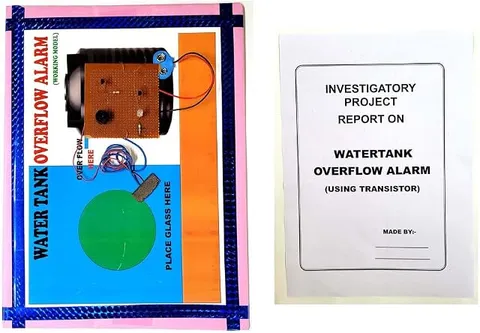
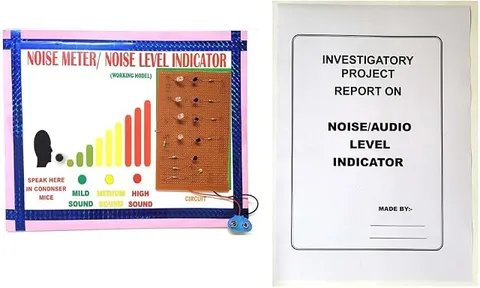
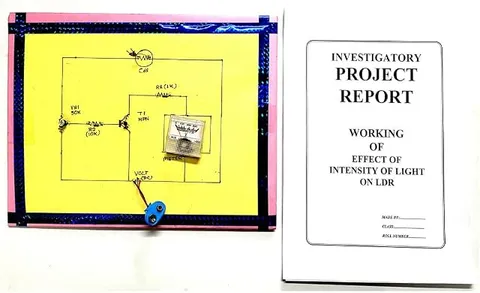
This handmade project is a water level indicator with a sound alarm, built on a multipurpose PCB according to its title. Instead of warning only when the tank is full, a level indicator shows how much water is in the tank at each stage, so you know when to switch the pump on or off. It is listed as a major project and suits Class 9 to 12 investigatory work.
How it works
The science behind it
The idea the model demonstrates, in words you can use in your report and when you explain it.
A level indicator places several probes at different heights in the tank, with one common probe at the bottom. Because tap water conducts through its dissolved ions, water rising past a probe connects it to the common probe. Each probe drives its own transistor stage, and each stage switches on one LED, so the number of glowing LEDs shows how high the water is: one for low, more for half and all of them for full. The sound alarm is usually linked to the top probe, so it beeps when the tank is full. This is a simple form of digital sensing: at each probe, water is read as either present or absent, 1 or 0, and more probes give a finer reading. Level indicators like this are fitted in many Indian homes and housing societies to avoid running the pump dry or letting the tank overflow.
Make it yourself
Make a water level indicator with alarm yourself
Build your own version from scratch, or use the steps to understand how the ready-made model is put together before you present it.
What you need 9
Step by step 8 steps
Fix the five probes on the plastic strip: the common probe reaching the bottom of the tank, and the other four at the quarter, half, three-quarter and full marks.
On the PCB, build one stage: the probe wire through a 1 kΩ resistor to a transistor's base, the emitter to the negative rail, and a 470 Ω resistor and an LED in series from the positive rail to the collector, with the LED's longer leg towards positive.
Copy that stage three more times so each level probe has its own transistor and LED, and use the red LED for the lowest level.
Connect the buzzer from the positive rail to the collector of the top-level transistor, so it sounds together with the 'full' LED.
Connect the common probe to the positive rail, and solder the five probe wires to the board with an adult, checking each transistor's pin order against its datasheet.
Fit the probe strip in the jar with all joints above the water, and keep the board and battery outside the jar.
Switch on and pour tap water in slowly: one more LED should light as the water passes each probe, and the buzzer should sound at the top.
Make a table of water height against the LEDs that are on, then pour the water out and check that they go off in the reverse order.
Read this first
Safety first
Go through these points before you build or switch anything on. Younger students should do this with an adult.
- Run the indicator only on its battery; never put the probes in a tank whose pump runs on mains power.
- Keep the PCB and battery dry and away from the water, and dry your hands before touching them.
- Solder only with an adult, in a ventilated place, and wash your hands afterwards.
- Do not use the model in drinking water, because the probes slowly corrode.
Troubleshooting
If something does not work
The usual problems with this model and how to fix them. Open a problem to see the fix.
One level never lights
Check that probe's wire, the solder joints of that stage and the transistor's pin order. Swap the transistor with one from a working stage to see whether it is faulty.
The LEDs glow faintly when the jar is empty
The probe strip is still wet, so a film of water is conducting. Dry it, and keep the probe wires apart where they run down the strip.
Several LEDs light as soon as water touches the bottom
The probe wires are touching each other, or a solder bridge is joining tracks on the PCB. Separate the wires and look for blobs of solder between tracks.
The full LED lights but the buzzer is silent
The buzzer is probably the wrong way round. Connect its positive lead to the positive rail.
Exhibition day
How to present it
A running order for the exhibition table or the practical, step by step.
Fill a transparent jar step by step and let the LEDs light one by one, ending with the alarm.
Mark each probe height on the jar and match it to the LED that lights.
Explain how the water at each probe is read as a 1 or a 0.
Discuss how the indicator saves electricity by telling you when to switch off the pump.
Practice
Viva questions
Practice questions on this model, with short answers. Try each one aloud before you open the answer.
How does a water level indicator sense the level?
Water conducts a small current between the common probe and each level probe it reaches, switching on the matching transistor and LED.
Why is a common probe placed at the bottom of the tank?
It is always under water, so it connects to any other probe once the water reaches that level.
Why is a transistor used for each level?
The current through water is tiny, so each transistor amplifies it enough to light an LED or sound the alarm.
What is the advantage of a level indicator over a simple overflow alarm?
It shows several intermediate levels, not just full, so you know roughly how much water is in the tank at any time.
Project file
Project file outline
The headings of the project file, in order. Give each heading its own section and write it in your own words.
Free ebook: Writing a Science Project FileContents
- Aim: to make an indicator that shows four water levels with LEDs and sounds an alarm when the tank is full
- Why level indicators are useful in homes, schools and farms
- Conduction through water and the job of the common probe
- One transistor stage explained, then the full circuit diagram
- Layout and soldering on the multipurpose PCB
- Testing: table of water height and LEDs lit
- Advantages, limitations and improvements
- Conclusion and sources used
Buying checklist
Before you buy
What to check before you order the model, and what to do when it arrives.
1Before you order
- The title calls it a major project; check with your teacher that this suits your class and syllabus.
- Check the listing for the battery it needs and whether one is mentioned; do not assume it is supplied.
- Inspect the solder joints and probe wires for anything loose, and handle the PCB by its edges.
- Keep the box and padding, as the probe strip and PCB can be damaged in a school bag.
- Check the delivery date for your PIN code on the marketplace, and order well before the exhibition or practical.
- Practise explaining it. Judges ask what the model shows and why; knowing the science matters as much as the model. The viva questions above are a good place to start.
2When it arrives
- When it arrives, test every level with a jar of tap water a few days before the exhibition.
Next steps
Take it further
Ways to turn this model into a bigger investigation or a stronger exhibition entry.
Add a low-level warning beep and explain how a pump could be started at low level and stopped at full.
Use more probes and a ten-LED bar display for finer steps.
Measure the current through one probe with a multimeter and explain why such a small current is enough to switch the transistor.
Audience
Who it suits
Class 9 to 12 physics investigatory projects and science exhibitions on electronics and water conservation. Despite the "15 Months Up For Baby" wording in the listing title, it is a student electronics project, not a toy for small children.
- ClassClass 10 to 12
- SubjectPhysics
- TypeReady-made model
Free to read
Free ebooks for this topic
Free PDF ebooks from Gurukul Technicals Institute on the science, the making and the presenting of projects like this one.
- Free PDF ebook
Physics Working Models Explained
Twenty classic models, how each works and how to make it
- Free PDF ebook
Investigatory Projects for Class 11 and 12
Topics, method and report structure for physics, chemistry and biology
- Free PDF ebook
Your Science Exhibition Guide
Choose a project, build it, present it and answer the judges with confidence
- Free PDF ebook
Writing a Science Project File
How to write the report, from the cover page to the bibliography