- Physics
- Class 1 to 9
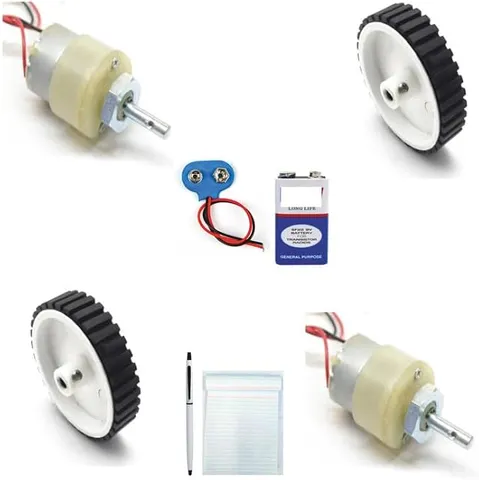
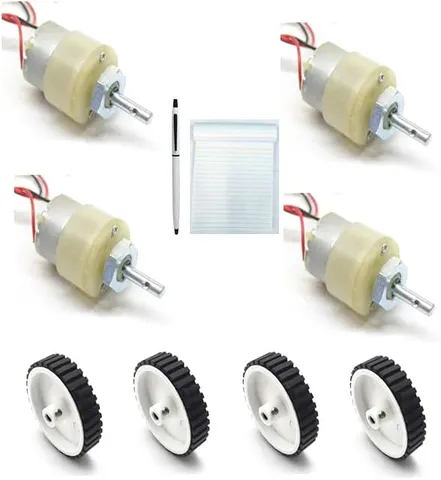
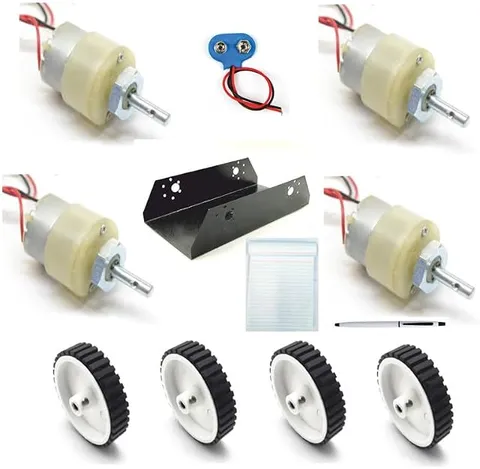
Set of 4 DC Metal Gear Motor with 4 Wheels and 1 Chassis
Code B0FGV2YDQ9
- Paid for and delivered by Amazon. The current price and the delivery date for your PIN code are shown there.
- Sold by Gurukul Technicals Institute, Delhi.
- Need a different topic, a custom version or a school order? Ask on WhatsApp.
Physics
About this part
A robotics starter set that, as the listing says, has four DC metal gear motors, four wheels and one chassis, the base for a four-wheel-drive robot car. It suits students moving from simple circuits to robotics projects such as line followers and obstacle-avoiding cars.
What the listing says
- Rough pad & Pen Free
How it works
The science behind it
The idea the part demonstrates, in words you can use in your report and when you explain it.
A DC motor works because a current-carrying conductor in a magnetic field experiences a force. The forces on opposite sides of the coil act in opposite directions and turn it, and the commutator reverses the current every half turn so the coil keeps rotating the same way. Fleming's left-hand rule gives the direction of the force. A bare motor spins fast but with little turning force, so a gearbox is added. Gears trade speed for torque: with a 30:1 ratio, the output shaft turns 30 times slower but with up to 30 times more torque, minus friction losses. This follows from power = torque × angular speed, so at the same power a slower shaft gives more torque. Metal gears carry higher loads and wear more slowly than plastic ones. Shifting a bicycle to a low gear to climb a slope uses the same trade-off. A microcontroller cannot supply motor current, so a motor driver sits between them.
Using it in your projects
Using a four-motor robot car chassis in your projects
What this part is good for, what else you need with it and how to connect it.
Projects you can build with it 7
- An obstacle-avoiding robot car with an ultrasonic sensor
- A line-following robot with two infrared sensors
- A phone-controlled car using a Bluetooth module
- A fire-fighting robot with a flame sensor and a small fan, tested on a candle lit by an adult
- A floor-cleaning robot model with a sponge pad
- An experiment comparing four-wheel drive with two-wheel drive on a ramp
- A seed-sowing robot model for an agriculture project
What else you need 9
How to connect it 9 steps
Read the voltage marked on the motors or in the listing, and choose a battery pack that does not go above it.
Test each motor on its own by touching its wires to the battery for a moment; it should turn smoothly, and reverse when the wires are swapped.
Fix the four motors to the chassis with their clamps, shafts pointing outwards, tightening the screws evenly so the wheels line up.
Fit the wheels and tighten each grub screw onto the flat side of the shaft, if the shaft has one.
Wire the two left motors in parallel and the two right motors in parallel, checking that both motors on each side turn forward together.
Connect the left pair to one channel of the driver and the right pair to the other. Connect the battery to the driver's power input, and join the driver's ground to the microcontroller's ground.
Upload a simple program for forward, backward, left turn, right turn and stop, and test it with the chassis raised on a box so the wheels are off the floor.
Add your sensor and program the car to avoid obstacles or follow a line.
Tidy the wires with cable ties so nothing can catch in the wheels.
Read this first
Safety first
Go through these points before you build or switch anything on. Younger students should do this with an adult.
- Keep fingers, hair and loose sleeves away from the wheels and gears, and do the first tests with the wheels off the ground.
- Charge rechargeable cells only with their proper charger, never short, puncture or charge them unattended, and stop using any cell that swells.
- The motor driver can get hot, so do not touch its heat sink while the car is running.
- Fit a main switch so you can cut the power quickly, and do not let the motors stay stalled against a wall.
Troubleshooting
If something does not work
The usual problems with this part and how to fix them. Open a problem to see the fix.
One wheel turns the opposite way to the other wheel on the same side
That motor's wires are the wrong way round. Swap its two wires at the driver.
The car curves when it should go straight
Motors are never exactly identical, and a loose wheel or rubbing part makes it worse. Check the wheels and mountings, then lower the speed of the faster side in your program.
The microcontroller restarts when the motors start
Four motors pull the battery voltage down sharply. Use fresh or higher-capacity cells, or give the microcontroller its own supply with the grounds joined.
A wheel keeps slipping off its shaft
The grub screw is not tight on the flat part of the shaft. Turn the wheel until the screw faces the flat side and tighten it.
Exhibition day
How to present it
A running order for the exhibition table or the practical, step by step.
Drive the car forward and backward and explain that reversing the current reverses each motor.
Show how the car turns by running the left and right motors at different speeds or in opposite directions.
Explain the speed-for-torque trade-off with the bicycle gear example before the judges ask.
Show your wiring diagram, including the motor driver if you use a microcontroller, and how the battery connects.
Practice
Viva questions
Practice questions on this part, with short answers. Try each one aloud before you open the answer.
On what principle does a DC motor work?
A current-carrying coil in a magnetic field experiences a force, and the forces on its two sides produce a turning effect.
What is the function of the gearbox on the motor?
It reduces the speed of the output shaft and increases its torque, so the motor can move a heavier load.
How does a four-wheel robot car turn without a steering wheel?
It runs the motors on one side slower than, or opposite to, the other side, which is called differential or skid steering.
Why is a motor driver needed between a microcontroller and the motors?
Motors need far more current than a microcontroller pin can safely give, so the driver handles that current while the microcontroller only sends control signals.
Buying checklist
Before you buy
What to check before you order the part, and what to do when it arrives.
1Before you order
- Check whether your project really needs four-wheel drive; a simple line follower can work with two motors.
- The title describes four metal gear motors, four wheels and one chassis; check the listing for the motors' voltage and speed so you can choose a battery and driver.
- Keep the small screws and nuts in a box so none go missing.
- Plan for a motor driver and battery pack if the listing does not mention them.
- Check the delivery date for your PIN code on the marketplace, and order well before the exhibition or practical.
- Practise explaining it. Judges ask what the part shows and why; knowing the science matters as much as the part. The viva questions above are a good place to start.
2When it arrives
- On arrival, count the parts against the listing and run each motor briefly in both directions.
Next steps
Take it further
Ways to turn this part into a bigger investigation or a stronger exhibition entry.
Time the car over a 2 m track at different battery voltages and compare its speed with the wheel circumference × rpm.
Find the steepest ramp the car can climb with all four motors and with only two connected, and explain the difference using torque.
Add wheel speed sensors so the program can keep both sides at the same speed and drive straight.
Audience
Who it suits
Suits Class 8 to 12 robotics projects, school Atal Tinkering Labs and engineering students building their first robot car.
- ClassClass 1 to 9
- SubjectPhysics
Free to read
Free ebooks for this topic
Free PDF ebooks from Gurukul Technicals Institute on the science, the making and the presenting of projects like this one.
- Free PDF ebook
Electronic Components Handbook
Resistors, capacitors, LEDs, diodes, transistors and more, with how to use each
- Free PDF ebook
Electricity and Magnetism Experiments
Hands-on experiments with cells, wires, bulbs and magnets
- Free PDF ebook
Motors, Gears and Motor Drivers
Make things move: DC motors, servos, steppers and how to drive them