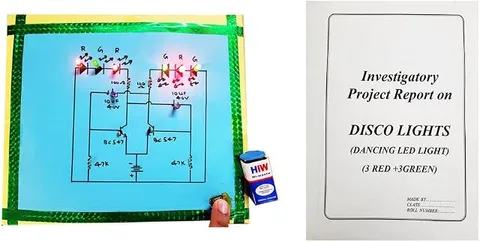
- Physics
- Ready-made model
- Class 10 to 12
Disco Dancing LED Lights Physics Working Model Educational Investigatory Project
Code B0BN2HQHCK
- Paid for and delivered by Amazon. The current price and the delivery date for your PIN code are shown there.
- Sold by Gurukul Technicals Institute, Delhi.
- Need a different topic, a custom version or a school order? Ask on WhatsApp.
In this project guide
Ready-made model
About this model
A physics working model of disco dancing LED lights, in which LEDs switch on and off in a lively pattern. It is an eye-catching way to explain LEDs, oscillator circuits and why fast-changing lights appear to move.
How it works
The science behind it
The idea the model demonstrates, in words you can use in your report and when you explain it.
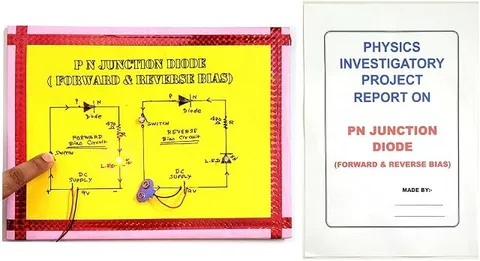
An LED, or light emitting diode, is a p-n junction diode that gives out light when it is forward biased. Electrons crossing the junction fall into holes and release energy as light, and the colour depends on the semiconductor material. LEDs waste far less energy as heat than filament bulbs. To make LEDs dance, a circuit must switch them on and off automatically. Circuits like this commonly use an oscillator, such as a 555 timer or a pair of transistors in an astable multivibrator, which produces a steady stream of pulses. A counter, or the transistors themselves, then turns different LEDs on in sequence. Some designs also respond to music through a small microphone. When the LEDs switch fast enough, our eyes blend them into motion because of persistence of vision: an image stays on the retina for about one-sixteenth of a second. The chasing serial lights on Indian balconies at Diwali work the same way.
Make it yourself
Make disco flashing LED lights yourself
Build your own version from scratch, or use the steps to understand how the ready-made model is put together before you present it.
What you need 9
Step by step 9 steps
Build the circuit on a breadboard first. Check the transistor's legs in its datasheet; for the common BC547, with the flat face towards you, they are collector, base, emitter from left to right.
Connect both emitters to battery negative.
Connect four LEDs of one colour, each with its 680 Ω resistor, from positive to the collector of the first transistor, and the four LEDs of the other colour the same way to the second transistor's collector.
- Cross-couple them
One capacitor from the first collector to the second base, and the other from the second collector to the first base, with each capacitor's + lead towards its collector.
Connect a 47 kΩ resistor from positive to each base.
- Switch on
The two colour groups should flash in turn, roughly once a second. Smaller capacitors make them faster, bigger ones slower.
For speed control, put the potentiometer in series with one base resistor and turn it while the lights flash.
Arrange the LEDs on the front panel in a pattern, such as alternate colours round a ring, so the flashing seems to jump about.
Solder the tested circuit onto the zero PCB and fix it behind the panel.
Read this first
Safety first
Go through these points before you build or switch anything on. Younger students should do this with an adult.
- Keep the flashing slow, below about three flashes a second, because fast flashing light can trigger seizures in people with photosensitive epilepsy.
- Fit the electrolytic capacitors the right way round.
- Solder only with an adult present, and keep the iron in its stand.
- Unclip the battery when the model is not on show.
Troubleshooting
If something does not work
The usual problems with this model and how to fix them. Open a problem to see the fix.
Both groups stay on and nothing flashes
A capacitor is missing, reversed or wired to the wrong place. Each capacitor must run from one transistor's collector to the other transistor's base.
Only one group ever lights
One transistor may have its legs in the wrong order or be damaged, or one side's capacitor may be open. Check that side carefully.
The flashing is too fast or too slow
The speed depends on R × C. Change the capacitors (for example 4.7 µF or 22 µF) or the base resistors.
One colour is much dimmer than the other
Blue and white LEDs need about 3 V, more than red or yellow. Use a smaller resistor, such as 470 Ω, for those LEDs.
Exhibition day
How to present it
A running order for the exhibition table or the practical, step by step.
Explain what makes the lights change: find the part of your circuit that sets the pattern, such as a 555 timer, a transistor pair or a microphone stage, and point to it.
Show an LED's two legs and explain why it lights only when connected the right way round.
Explain persistence of vision using the Diwali serial lights example.
Dim the surrounding light if possible so the pattern stands out.
Practice
Viva questions
Practice questions on this model, with short answers. Try each one aloud before you open the answer.
What is an LED?
An LED is a semiconductor diode that emits light when current flows through it in the forward direction.
What decides the colour of an LED?
The semiconductor material, which sets how much energy each electron gives out when it falls into a hole, and so the colour of the light.
What is an astable multivibrator?
It is a circuit with no stable state that keeps switching between high and low on its own, producing a continuous stream of pulses.
What is persistence of vision?
The impression of an image stays on the retina for about one-sixteenth of a second, so quickly changing lights look continuous or moving.
Project file
Project file outline
The headings of the project file, in order. Give each heading its own section and write it in your own words.
Free ebook: Writing a Science Project FileContents
- Aim: to make LEDs flash in an alternating disco pattern using an astable multivibrator
- Introduction: LEDs and why they have replaced bulbs in decorative lights
- How an LED works: the p-n junction, and colour set by the semiconductor material
- The transistor as a switch and the astable multivibrator
- Time period of the flashing: T ≈ 0.69 (R1C1 + R2C2)
- Circuit diagram and construction
- Observations: flashing rate with different capacitor values
- Why lights switching in sequence appear to move
- Conclusion and bibliography
Buying checklist
Before you buy
What to check before you order the model, and what to do when it arrives.
1Before you order
- Check that an LED or oscillator project suits your class level and your teacher's instructions.
- Read the listing to see how the model is powered and whether batteries are mentioned.
- Keep spare batteries and the box for the exhibition day.
- Check the delivery date for your PIN code on the marketplace, and order well before the exhibition or practical.
- Practise explaining it. Judges ask what the model shows and why; knowing the science matters as much as the model. The viva questions above are a good place to start.
2When it arrives
- Test it as soon as it arrives and check that the flashing is not uncomfortably fast.
Next steps
Take it further
Ways to turn this model into a bigger investigation or a stronger exhibition entry.
Make the lights react to music by adding a microphone and a transistor amplifier, so they flash to the beat.
Add a 555 timer and a CD4017 counter to make ten LEDs run in a chasing pattern.
Measure the flash period for several capacitor values, plot period against capacitance, and check that the graph is a straight line.
Audience
Who it suits
Suits Class 8 to 12 physics exhibitions and beginner electronics projects.
- ClassClass 10 to 12
- SubjectPhysics
- TypeReady-made model
Free to read
Free ebooks for this topic
Free PDF ebooks from Gurukul Technicals Institute on the science, the making and the presenting of projects like this one.
- Free PDF ebook
Electricity and Magnetism Experiments
Hands-on experiments with cells, wires, bulbs and magnets
- Free PDF ebook
Physics Working Models Explained
Twenty classic models, how each works and how to make it
- Free PDF ebook
Investigatory Projects for Class 11 and 12
Topics, method and report structure for physics, chemistry and biology
- Free PDF ebook
Your Science Exhibition Guide
Choose a project, build it, present it and answer the judges with confidence