Science projects
Your Science Exhibition Guide
Choose a project, build it, present it and answer the judges with confidence
 Gurukul Technicals InstituteProjects & kits · Computer education · RoboticsBecome a Franchise PartnerMenu
Head office, Rana Pratap Bagh, Delhi
Science project idea finder
Find a project by class, subject and type. Every idea explains the science it shows, what you need, how long it takes and how to stay safe, with free ebooks and ready-made kits if you need them. 930 ideas have numbered steps and viva questions on their own page.
Want a complete build with diagrams? 16 free detailed project guides
Idea finder
Choose your class and what interests you, or search for a word such as magnet, solar, heart or robot. Open any card for a summary, or its title for the full page with the science, the steps and the viva questions.
When baking soda reacts with vinegar, the carbon dioxide escapes and the flask gets lighter. Following the mass on a balance every 30 seconds gives a rate curve, and repeating with diluted vinegar shows that the rate falls as the acid concentration falls, while the total gas depends only on how much acid was present.
Safety: Vinegar is a dilute acid; avoid eyes and wash hands. Never cap the flask tightly while it fizzes; the cotton plug lets gas out but stops spray.
Take it further: Keep the concentration fixed and run the reaction at three temperatures to compare the effect of temperature with that of concentration.
Passing a small current through copper sulphate solution deposits a layer of copper on the object connected to the negative terminal, while the copper anode slowly dissolves to replace the copper ions. A clean steel key or coin comes out with a bright copper coating.
Safety: A teacher or adult must prepare the copper sulphate solution and supervise throughout; copper sulphate is harmful if swallowed and irritates skin and eyes, so wear gloves and goggles and wash hands. Use only batteries, never mains, and give the used solution back to the teacher for disposal rather than pouring it down the drain.
Take it further: Plate two keys for 5 and 15 minutes and compare the colour and thickness of the coating.
The mass of copper deposited in electrolysis is proportional to the charge passed, that is current multiplied by time. Weighing the cathode after fixed intervals at a steady current gives a straight line, and the slope lets you estimate Faraday’s constant from school equipment.
Safety: Teacher supervision is required; copper sulphate is harmful if swallowed and irritates skin and eyes, so wear gloves and goggles. Use only batteries. Return the used solution to the teacher for disposal.
Take it further: Repeat at double the current and show that the slope of the mass against time line doubles.
Fats and oils are esters of glycerol and fatty acids. Heating coconut oil with sodium hydroxide solution breaks these esters into glycerol and the sodium salts of the fatty acids, which is soap. A small batch sets into a hard bar that is tested for leftover alkali before it is ever used.
Safety: Sodium hydroxide is strongly caustic and this project must be done only in the school lab with the teacher weighing, dissolving and handling the lye. The pellets are always added to water, never water to pellets, because the mixture gets very hot. Everyone wears gloves and goggles, keeps vinegar nearby to rinse any splash on skin, and no one touches the fresh soap bare-handed. The bar is not used on skin until it has cured four weeks and its pH test shows it is mild.
Take it further: Make a second small batch with potassium hydroxide, if the teacher allows, and compare the soft soap it gives with the hard sodium soap.
Soap forms insoluble scum with the calcium and magnesium in hard water and lathers poorly, while a synthetic detergent forms soluble calcium salts and lathers almost as well in hard water as in soft. Measuring foam height for both cleaners in water of increasing hardness makes the difference visible and numerical.
Safety: Epsom salt and calcium chloride are not for eating; wash hands after use. Nothing is heated.
Take it further: Add washing soda to the very hard water before testing soap and show that the foam height recovers.
Fizzy drinks and juices contain phosphoric, citric and carbonic acids. Counting the drops of a fixed baking soda solution needed to neutralise a measured volume of each drink, watched with a natural indicator, ranks them by acid content and links the result to tooth enamel damage.
Safety: Do not drink any sample after indicator is added. Phenolphthalein, if used, must be handled by the teacher.
Take it further: Measure the pH of each drink with pH paper and discuss why pH and total acid do not rank the drinks in exactly the same order.
Tea and coffee are mildly acidic, and the acidity depends on how long they brew and whether milk is added. Measuring pH with indicator paper for black tea, green tea and coffee brewed for different times shows how extraction of acids changes with time and how milk partly neutralises them.
Safety: An adult must pour the hot water and the brews must cool before any strip is dipped. Do not drink brews that have had indicator strips in them.
Take it further: Measure the pH of the same tea brewed in bottled, tap and borewell water to see whether the water itself shifts the result.
Rusting is an electrochemical process that speeds up when the water conducts better. Nails kept in water with 0, 1, 3.5 and 10 percent salt for two weeks, then cleaned and weighed, show that salt accelerates corrosion, which is why vehicles and ships near the sea rust faster, and also that very strong brine slows it again.
Safety: Nails are sharp; carry them point down. Rust-cleaning should be done over newspaper and hands washed afterwards. No chemicals other than salt and water are used.
Take it further: Repeat with one jar of boiled, cooled water sealed with a layer of oil on top to show that removing oxygen almost stops rusting.
An iron nail wrapped with zinc stays bright in salt water because the more reactive zinc corrodes instead, while a nail wrapped with copper rusts faster than a bare nail because copper makes the iron the more reactive partner. This is the chemistry of galvanised sheets and the zinc blocks bolted to ship hulls.
Safety: Nails and wire ends are sharp; an adult should cut the wire. Only salt water is used. Wash hands after handling.
Take it further: Connect a nail to a zinc strip with a wire instead of a wrap, both in the same jar, to show that protection works even when the metals are not touching directly.
The acetic acid content of vinegar can be compared by titrating a measured volume with a standard washing soda solution until an indicator changes colour. Running three brands and a home-made dilution ranks them by strength and, with a simple calculation, gives an approximate percentage of acid to compare with the label.
Safety: Vinegar and washing soda solution can irritate eyes; wear goggles if available and wash hands. The teacher handles phenolphthalein. Nothing is tasted.
Take it further: Titrate lemon juice and lime juice the same way and compare their citric acid content, remembering that citric acid gives three hydrogen ions per molecule.
Antacids are bases or salts of weak acids that react with acid and neutralise it. Counting how many drops of vinegar one tablet can neutralise lets you compare brands fairly, per tablet and per gram.
Safety: An adult must supervise. Do not eat the tablets or any solution you make. Wash hands after crushing the tablets and do not touch your eyes.
Take it further: Compare milk of magnesia, baking soda and chalk powder as antacids per gram and say which is the most effective base by mass.
Eggshell is mostly calcium carbonate. When it reacts with vinegar it gives off carbon dioxide, so the loss in mass of the flask tells you how much calcium carbonate was present.
Safety: An adult must supervise. The mixture froths strongly, so use a jar much bigger than the liquid. Wash hands after handling raw eggshell because it can carry germs.
Take it further: Repeat with chalk, marble chips and a sea shell, and compare the percentage of calcium carbonate in each.
Dissolving some solids makes the water colder (endothermic) and dissolving others makes it warmer (exothermic). The reason is the balance between the energy needed to break the solid apart and the energy released as water surrounds the particles.
Safety: An adult must supervise and handle the calcium chloride and urea with gloves and wear goggles. Do not taste any chemical and wash hands afterwards. Calcium chloride is an irritant and can become hot.
Take it further: Estimate the heat absorbed using q = mass of water x 4.18 x temperature change and compare the values per gram of each solid.
A more reactive metal pushes a less reactive metal out of its salt solution. Iron displaces copper from copper sulphate, and the mass of copper formed can be compared with the mass of iron used.
Safety: An adult must supervise. Copper sulphate is harmful if swallowed and irritates eyes and skin, so wear gloves and goggles and keep it away from food and children. Pour waste into a labelled container for the teacher, not down the drain.
Take it further: Test a zinc strip, a magnesium ribbon and a piece of tin foil in the same solution and rank the metals from most to least reactive.
When liquid wax freezes it gives out latent heat, so the temperature stays nearly steady while it solidifies. The flat part of the cooling curve marks the freezing point.
Safety: An adult must supervise. Heat the wax only in a water bath, never over a flame, because wax can catch fire. Hot water scalds, so use tongs or a cloth, and keep the thermometer away from the flame or hot plate.
Take it further: Repeat with ice made from salty water and compare the freezing point and the shape of the curve with pure water.
A dissolved solid raises the boiling point of water, and the rise grows with the amount of solute. This is called boiling point elevation and is a colligative property.
Safety: An adult must do all the heating and handle the boiling water. Keep children away from the stove. Do not touch the pan, and do not let the thermometer rest on the hot base. Let the pan cool fully before pouring.
Take it further: Repeat with sugar and compare the effect per mole to show that ions count separately.
Crystals of potash alum contain water locked in their structure. On heating the water is driven off as steam and the crystal puffs up into a white powder that weighs much less than before.
Safety: An adult must do all the heating. Use tongs, because the metal gets very hot. Keep your face away from the steam and the puffed powder. Do not taste the alum, and wash hands afterwards.
Take it further: Do the same with copper sulphate crystals, noting the blue to white colour change, if your teacher can supervise it in a lab.
Solubility is the mass of solute that dissolves in a fixed amount of water at a given temperature. A plotted curve shows that for alum it rises sharply with temperature, and for common salt it hardly changes.
Safety: An adult must supervise all heating in the water bath and handle hot containers with tongs. Do not taste any solution. Wash hands after the work.
Take it further: Add a third curve for sugar, using larger masses, and compare its shape with the other two.
A fixed amount of gas at constant pressure expands steadily as its temperature rises. A graph of volume against temperature is a straight line that points to about minus 273 degrees C.
Safety: An adult must handle the hot water. Do not use water above 70 degrees C. Do not push the syringe hard against a closed tip, since the plunger can pop out.
Take it further: Keep the temperature fixed and press the plunger by adding known weights to test Boyle’s law, that pressure times volume is constant.
In a clock reaction nothing seems to happen for a measured time and then the colour changes suddenly. The delay depends on how much vitamin C is present, so the time can be used to measure concentration.
Safety: An adult must supervise. Tincture of iodine is poisonous if swallowed and stains skin and clothes. Hydrogen peroxide can irritate eyes. Wear gloves and goggles, do not taste anything and keep away from food. Pour waste down the drain with plenty of water only if the adult agrees.
Take it further: Use the graph of known amounts to estimate the vitamin C in a glass of orange juice.
Catalysts speed up a reaction without being used up. Yeast and raw potato contain catalase, an enzyme that breaks hydrogen peroxide into water and oxygen, and the volume of oxygen collected measures how fast it works.
Safety: An adult must supervise. Wear goggles because hydrogen peroxide irritates eyes. Do not seal the reaction bottle completely or it may burst, and do not drink or taste anything. Wash hands afterwards.
Take it further: Test the effect of temperature on yeast by chilling or warming the peroxide to 10, 30 and 50 degrees C.
A chemical cell turns the energy of a redox reaction into electricity. Zinc and copper in their salt solutions, joined by a salt bridge, give a voltage of about 1 volt that falls as the reaction proceeds.
Safety: An adult must supervise. Copper sulphate is harmful if swallowed and irritates the skin and eyes; wear gloves and goggles. Do not put cells in the mouth. Dispose of the solution as the teacher directs.
Take it further: Replace zinc with an iron nail or an aluminium strip and compare the voltages to build a small electrochemical series.
Many natural dyes wash out of cotton unless a mordant is used. A mordant such as alum forms a link between the dye and the fibre, making the colour stronger and more lasting.
Safety: An adult must supervise all heating. Use tongs, because the cloth and water are hot. Do not use cooking pans afterwards for food. Do not taste the dye or alum.
Take it further: Try tea, marigold petals and beetroot and record which dyes are fast to washing and to light.
A green leaf contains several pigments. Paper chromatography separates them because they travel up the paper at different speeds, and the ratio of distances, the Rf value, identifies each one.
Safety: An adult must supervise. Rubbing alcohol is flammable and its fumes irritate. Work in a ventilated space with no flame, stove or candle nearby. Do not taste it and keep it away from children.
Take it further: Compare pigments of a green leaf, a red amaranth leaf and a dry autumn leaf to see which pigments are missing.
Before you start
Six things to think about before you decide. A project you understand and finish well beats a big one you rush.
Good projects answer a question you are curious about: why does iron rust, which fabric keeps tea hottest, how does a robot follow a line? A question gives your project a purpose.
Find out whether your teacher wants a working model, a still model or an investigatory project, the size limits, the topic or theme, the date, and whether ready-made models are allowed.
Each idea here shows a class band, a difficulty and a rough time. Choose something you can finish properly with time to test it, rather than something huge you have to rush.
Judges and examiners ask how it works. Choose an idea whose science you understand, or can learn from your textbook and the free ebooks, and practise explaining it.
Write down everything you need before you start. Many models use things from home; motors, LEDs, sensors and boards are easy to buy as spare parts or in a kit.
Change one thing and measure what happens, add a chart of your readings, or show a real-life use. Even a well-known model becomes yours when you add your own observations.
Plan your time
Work backwards from the date of your exhibition or submission. Short of time? Do the same steps faster, but never skip testing.
On the day
You will usually have a minute or two to explain your project, then questions. Practise both out loud at home.
Projects and kits
Need a working model, a kit to build yourself, or a motor, LED, battery or sensor to finish your own? Every idea card links to the matching section of the store.

Cannot find what you need? Ask the head office on WhatsApp.
Free ebooks
Step-by-step project books for every class, plus guides to exhibitions, project files and viva questions. Free to download, read and print.
Science projects
Choose a project, build it, present it and answer the judges with confidence
Science projects
How to write the report, from the cover page to the bibliography
Science projects
How to answer examiner questions, with sample questions for popular projects
Science projects
Simple, safe projects young children can make with a little help
Science projects
Working models matched to middle-school science topics
Science projects
Topics, method and report structure for physics, chemistry and biology
Stay safe
Read these with a parent before you start. Ideas that need extra care carry their own safety note on the card.
Power your models with cells, batteries or a low-voltage adapter. Never connect anything home-made to a wall socket.
Cutters, blades, glue guns, soldering irons and drills need an adult beside you. Cut away from your body on a board.
Use only safe household materials at home. Acids, stains and other lab chemicals are for the school lab with your teacher. Wear goggles and never taste anything.
Candles and burners only with an adult present and water nearby. Tie back long hair and keep paper away.
Do not short-circuit a battery, mix old and new cells, or puncture or heat a lithium battery. Remove batteries when the model is stored.
Magnets, button cells and small parts can be swallowed. Keep them away from younger brothers and sisters, and wash your hands after making.
Still have a question?
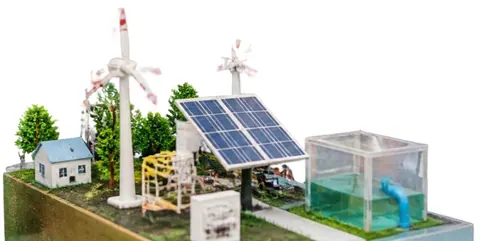
Chat on WhatsAppA working model moves or works to show a principle, such as a windmill that lights an LED. A still model shows how something is built or arranged, such as the layers of the Earth. An investigatory project asks a question and answers it by experiment: you change one thing, measure the result and draw a conclusion from your readings.
Check your school’s rules first: some competitions want models made by the student, and some allow ready-made ones. Either way, you must understand how it works and be able to explain it. A good approach is to build from a kit, or to add your own measurements and chart to a ready-made model.
Each idea here shows a rough time for the making. Leave extra time for reading, testing, the report and practice: three to four weeks from choosing to presenting is comfortable for most school projects.
A title page, your aim, the science behind it, the materials, the method with a diagram, your observations in a table, the result and conclusion, precautions, and the books and websites you used. The free ebook “Writing a Science Project File” explains each part.
Carry spare cells, wires and tape, and test everything when you arrive. Take a short video or photos of it working at home. If something still fails, explain calmly what should happen and what you would check: judges value understanding as much as a perfect model.
More help
Read the student help pages, try the free calculators for circuits and units, or ask the head office on WhatsApp.